Do you think just because you don’t have a high-end camera, you can’t take good pictures of your products to upload on your website or share on social media?! Well, the truth is you actually can take amazing and high-quality product photos with your smartphone!
Why do you need to spend so much time and energy thinking about product photography, anyway? Well, it’s estimated that in 2020, 2.05 billion people will buy something online. That’s a lot of potential customers, so you need photos that really stand out and showcase how great your products are!
We know that good product photography can be the deciding factor when someone goes to make a purchase online either through your website or through social media. Even if you don’t sell products online, like if you sell services instead, strong imagery can help you connect to your potential client much faster than your copy or sales pitch.
Need proof? Field Agent found 83% of U.S smartphone users said that product photos are “very” or “extremely” important. Meanwhile, another study from Justuno states that 93% of consumers consider visual content to be the key factor in making a purchase. Clearly, good photos equal more sales.
93% of consumers consider visual content to be the key factor in making a purchase
Field Agent’s research also found that while videos are a great option to showcase your products or services, they might not be the best option – especially if they are the only option. Videos consume too much data and sometimes take too much time to load. Having great photos should be your top priority.
Keep reading to find out:
9 Product Photography Tips to Create Better Pictures
I know that taking out your phone and shooting photos can be overwhelming. So, before you do that, I have some tips to share to help you better understand what makes good product photography good!
Product photography, just like any other kind of photography, must have some basic requirements to accomplish your goals. Here are nine things all professional photographers do that you should also do when shooting images with your smartphone:
1. Use High-Resolution Images
Quality photos are extremely important. They give you more credibility, and people will feel more comfortable purchasing from you. They will trust you, and this is extremely important for small businesses selling online.
Make sure your photos are clean, that the background is not distracting and that people can clearly see the subject of the photo. Your photos should not be pixelated or blurry. Most smartphones nowadays have great cameras, but if your photos are too small or have poor resolution, it will be difficult for people to see the details of the product.
Make sure your smartphone camera takes pictures that are at least six megapixels (MP). To give you an idea, iPhone 6 has an 8MP camera and the Samsung Galaxy S4 has a 12MP camera, so if you have a newer phone, this shouldn’t be an issue. When you upload your finished photo, make sure the image size is at least 1000px on the longest side, but ideally, it should be at least 2000px.
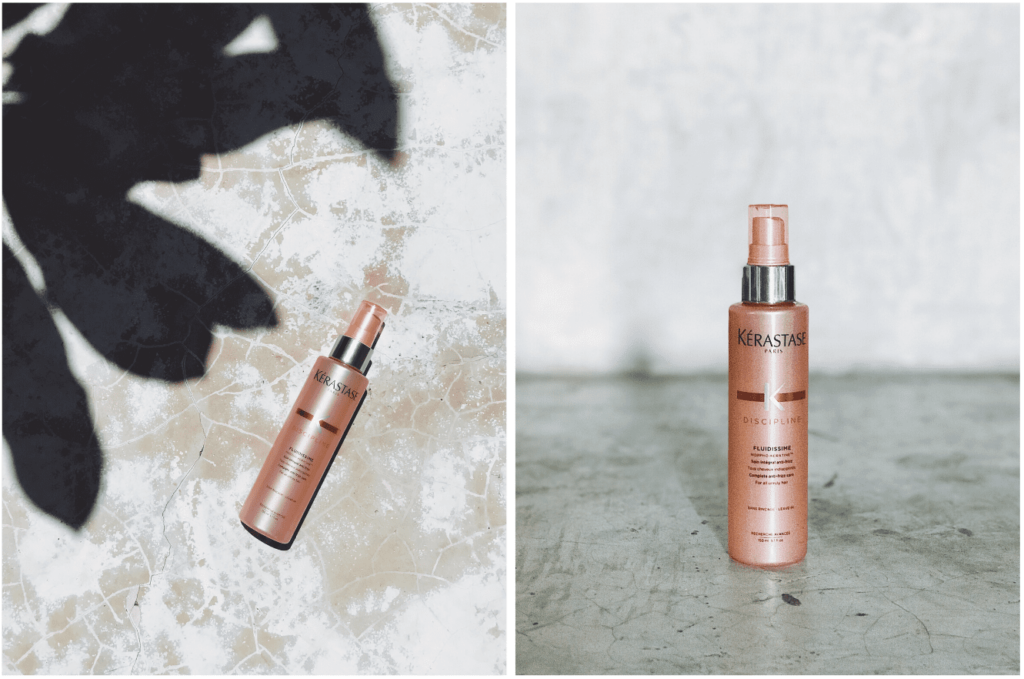
2. Use Different Angles and Settings
Buying products online is sometimes challenging. Not being able to hold and actually see the product from every angle might prevent customers from buying from you.
However, you don’t need to be a professional photographer to create good images that make buyers feel more confident about making a purchase.
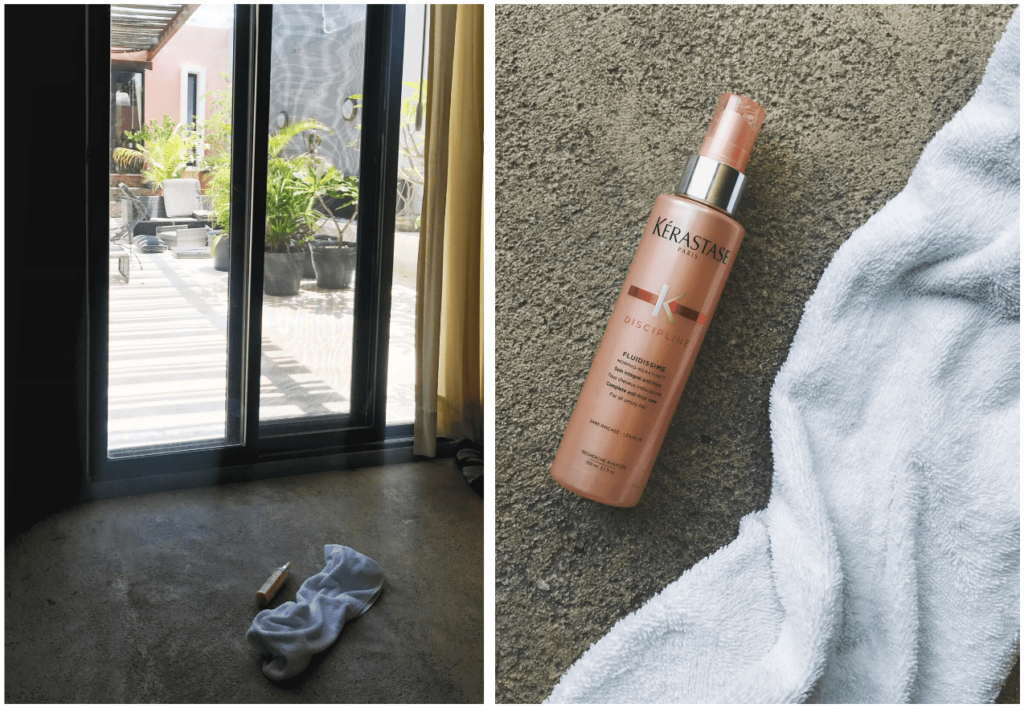
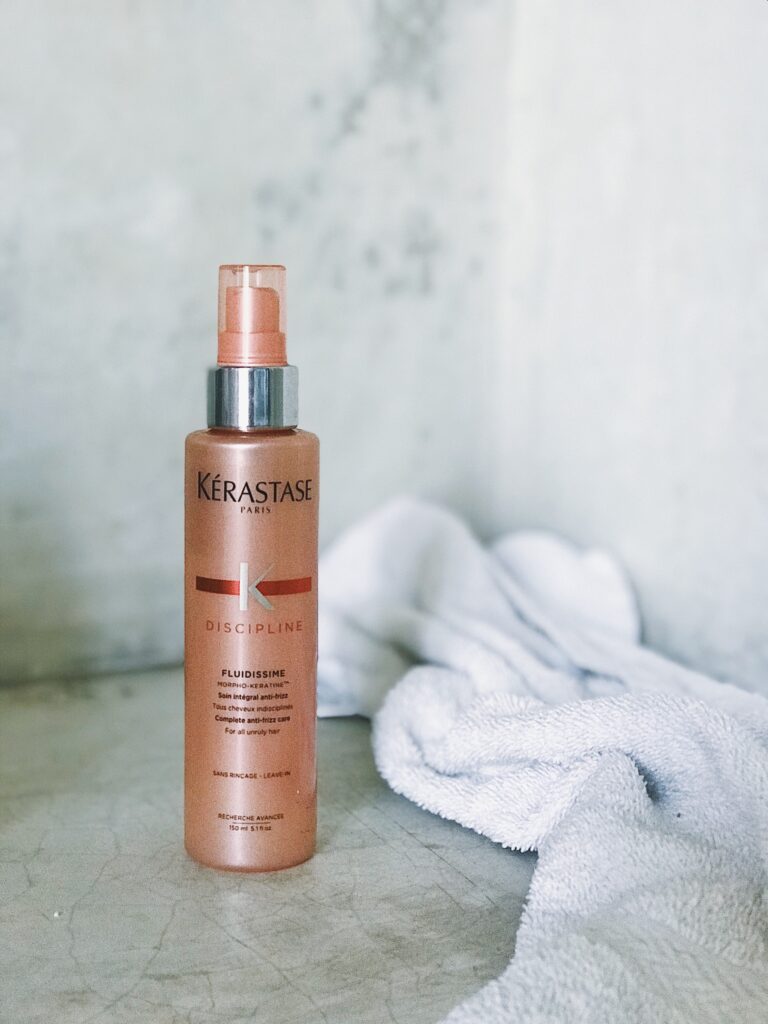
First, make sure you have at least two types of product photos. You want one that shows your product in a still photo, preferably on a white background. You also want one that shows the product being used by someone or placed in real life context.
Pictures of products on a white background help customers see all of the details clearly. Lifestyle photos are great to help people to understand the proportions, how they can style it and how it would fit their lives.
Take photos from different angles so people can clearly see everything. When you make it easy for people to make a decision about your product, you also make it easy for people to buy from you.
3. Be Accurate
There’s nothing more disappointing than ordering something online only to discover that it’s completely different from what you thought it would be.
Of course, you can edit your photos to make them look better, but don’t mess with the color or distort the image in a way that makes it look inaccurate. This will only lead to poor customer experience, bad reviews, and the very likely chance that you will lose that customer for life.
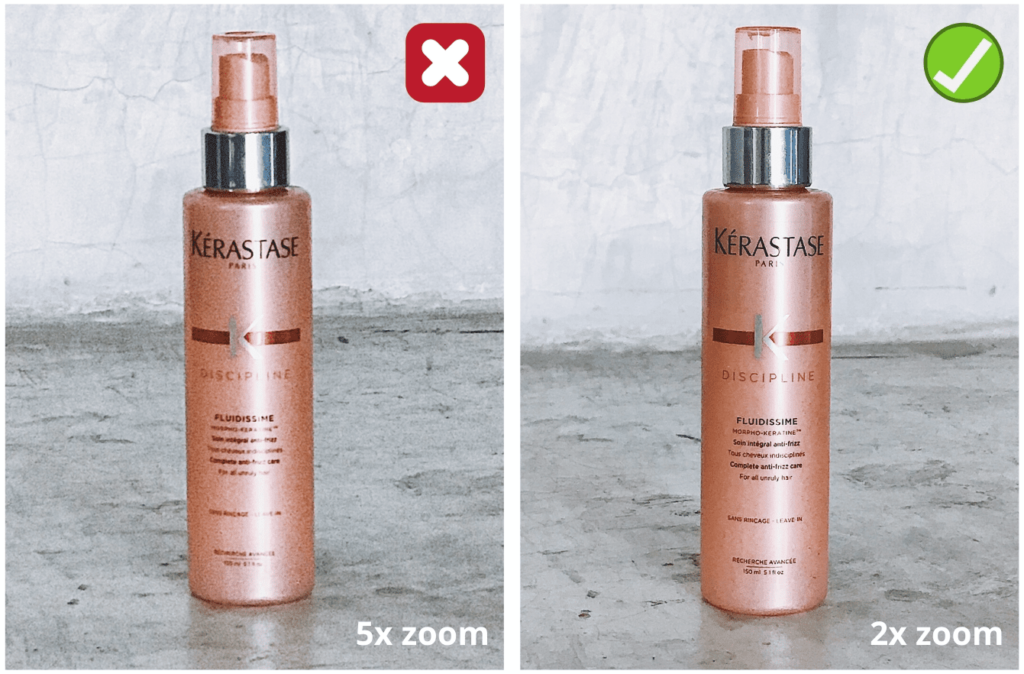
4. Don’t Zoom In Too Much
A huge mistake non-professional photographers make with their smartphone cameras is zooming in too much. Here’s the thing: professional DSLR cameras (the ones that have lenses that you can swap out) have the ability to zoom in ways that your smartphone camera simply does not.
DSLR lenses have a mechanism that “approaches” the subject when you zoom in without compromising the image’s quality. Most smartphone lenses don’t have hardware as powerful as professional cameras.
When you zoom in with your phone, the camera digitally “approaches” the subject. This causes the photo to become pixelated and lose quality. If you need a closer shot, it’s best to physically approach the object, e.g. position your phone closer to the object rather than zooming in.
5. Clean Your Lenses
A lot of people neglect this step, but it is super important. We use our phones so often, and they get dirt, grime, and fingerprints all over them. Just hold your phone against the light, and you’ll see how dirty your screen is!
It should come as no surprise that your camera lens gets pretty dirty, too. Professional photographers know that before you start shooting photos, you must clean your lens with a soft cloth first.
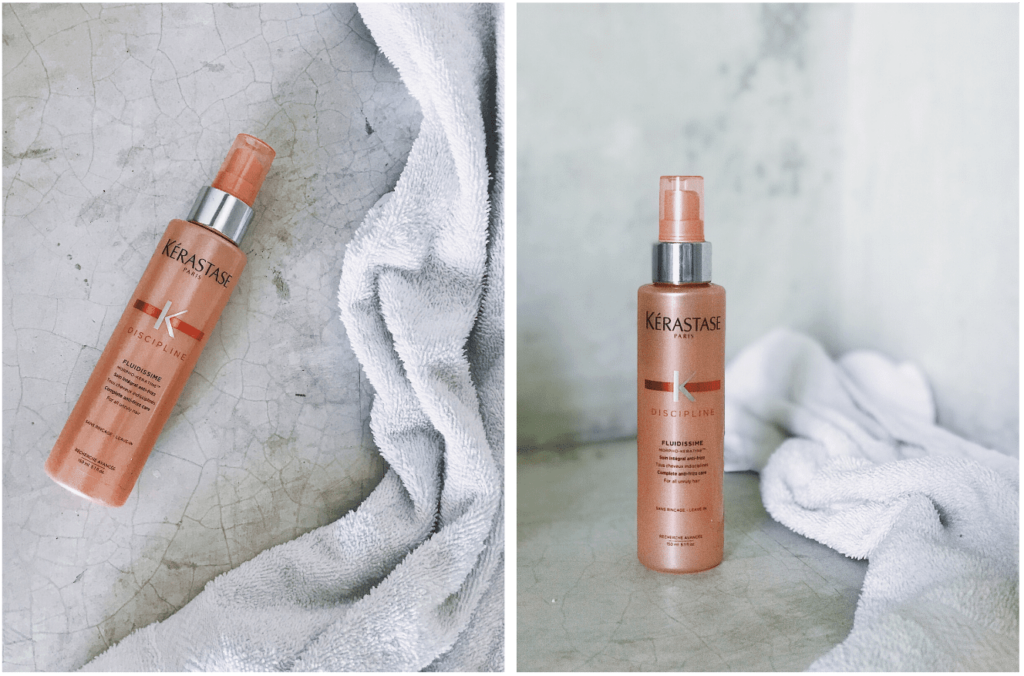
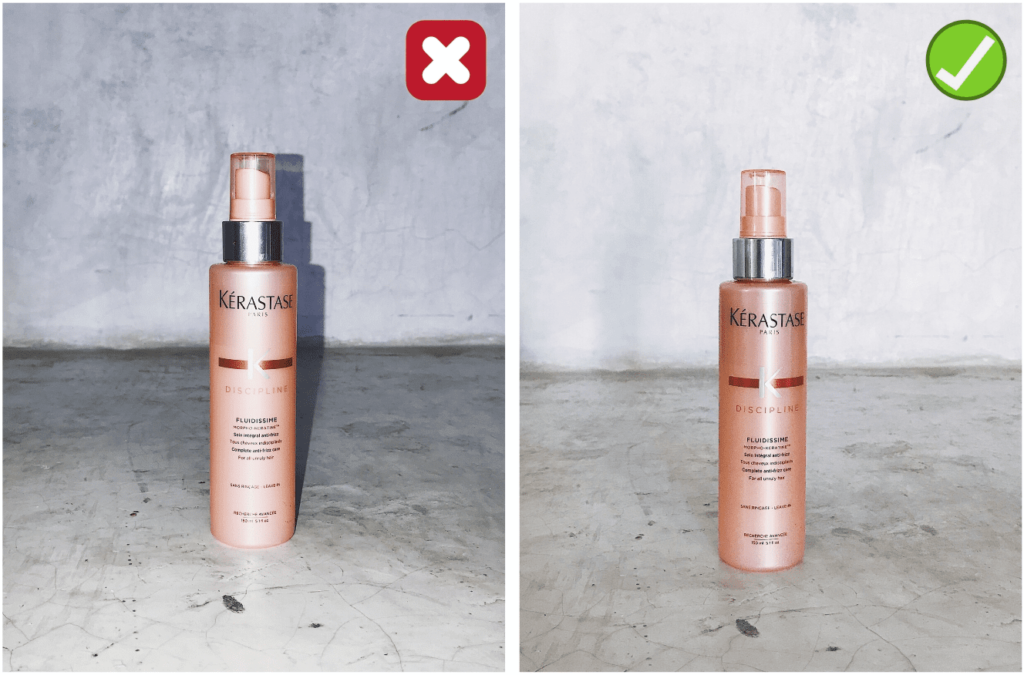
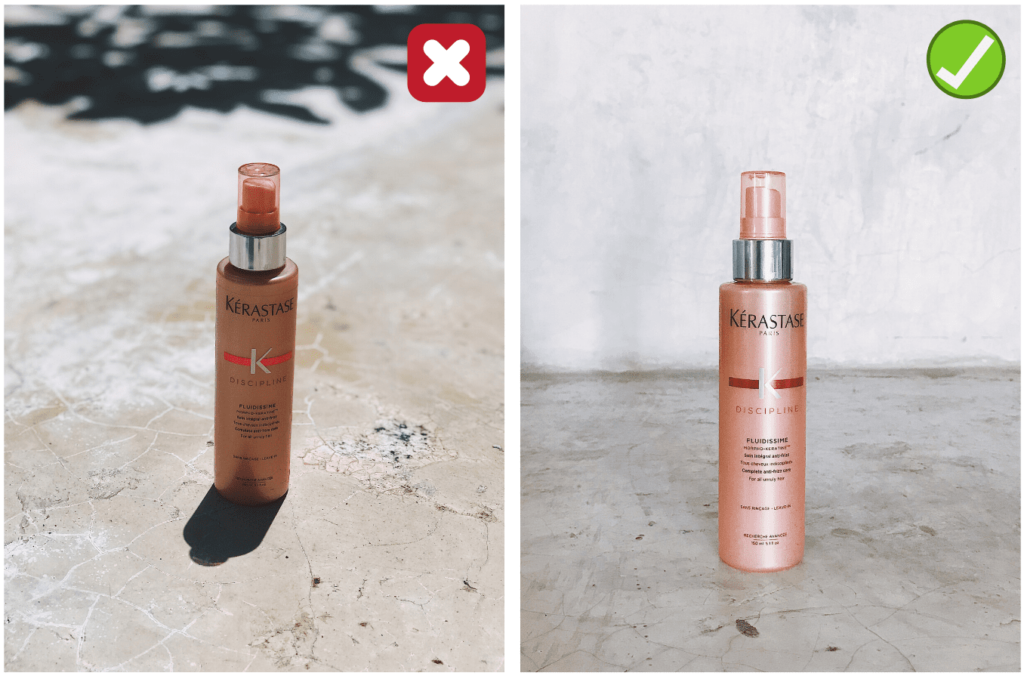
6. Photograph in a Well-Lit Room
Another factor that plays a big part in product photography is lighting. Photographing in a well-lit room and knowing how to position the lights is crucial for good photography.
If you take your pictures with low light, chances are your photos will be pixelated and have too much noise. On the other hand, if you take photos with an incandescent light – the yellow ones – your photo will look too yellow, and the colors of your product might not look as they do in real life.
The best light for product photography is natural light, like the soft indirect light that comes from a window. You do not want the sun to shine straight onto your products. You can diffuse the light by hanging a thin white cloth in front of the window if the sun is too bright.
You can also use two small lights (like a basic lamp you have around your house) on each side of the product. Something this simple is often enough to create a cool studio effect for shooting professional quality photos with your phone’s camera!
7. Don’t Use the Flash
Having enough light is extremely important; however, your smartphone flash might not be the best option if you’re trying to take photos in a darker environment.
The biggest problem is that the light from your flash is usually too harsh and direct. It causes hard shadows and sometimes cause reflections on your subject’s surface.
Rather than using the flash, make sure the room itself – or the “photo corner” you’re using – is well-lit. This will make your photos look much more professional.
8. Use a Tripod
This tip is important, especially if you’re shooting product photos for catalogs or your online store. If you can, use a tripod. It doesn’t need to be a big one, you can just use a small one that you can place on the table if you prefer.
Doing this will keep your camera steady, making your image sharper. It will also help you create more consistent photos. When you hold your phone in your hands, it’s difficult to match the same height and angles in every single photo. Having your phone in a steady position will help all your pictures look the same.
If you don’t have a tripod, you can mark a spot on a table and use some books as support. I don’t have a tripod with me, so I often use other objects like books to pens to keep my camera angle consistent.
9. Keep the Horizon Straight
There’s one thing that makes every image look awful, and it’s a crocked horizon. An easy tip to help you get the horizon straight in your photos is to activate your camera grid. The grid shows straight lines on your camera screen that you can use to align your photos.
This tip is especially important for lifestyle pictures. While tilting your camera slightly might create an interesting composition, it should be used sparingly. It’s usually much safer to just opt for the straight horizon. Even if you’re shooting “studio” photos with a sweep background, I encourage you to use the camera grid. I know sweep backdrops don’t actually have an horizon, but if your smartphone camera is not straight, your products will look like they are “falling.”
Step-by-Step Product Photo Tips
High-quality product photos are essential to convert more browsers into buyers. Don’t believe me? Etsy, one of the greatest e-commerce websites out there, found out that 90% of its users consider photos to be the most important factor to purchase on their platform.
Meanwhile, research conducted by Big Commerce shows that 78% of people want to see the products in action as if they were part of their lives. What does it mean? Well, they want to see a beauty product on a beauty shelf surrounded by other beauty products. They want to see those rollerblades being used by a cool hipster dude near the beach so they can picture themselves in that place using that product. They want to see your dishes surrounded by fresh ingredients on a nice countertop.
When you showcase your products in a real life situation, your potential buyers can easily see how having that item will change their life for the better. You’re starting to see that photography is pretty important, aren’t you?
Now that you have some of my favorite tips, I am going to walk you through the actual process to create the perfect photo using your smartphone’s camera. I’ll also show you how you can easily rinse and repeat the process so you can take all of the images you will need to make more online sales!
Read more: Instagram Marketing for Small Businesses 101
1. Batch It
Batching is my absolute favorite tip for everything, including shooting product photos. I find that it makes me more productive because you can knock out a whole bunch of work at once.
Imagine if you had to set up everything just to take one single photo. Then, the next day when you realize you need another photo, you have to get your camera back out and set everything up all over again. How time consuming would that be?
Instead, set aside a few hours to batch the production of your images. Set everything up, get your camera set up, then take all the photos you need to take in one single session. When you’re done, you can edit all of the photos together (more on that later) and you’ll gave a huge library of photos, all ready to go.
2. Set Up Your Smartphone Camera
You’ve cleaned your camera lens, turned off the flash, and you have your tripod (or stack of books) all ready to go.
You’ve activated the grid on your smartphone camera so you can check if your product is right in the middle and your horizon is straight. You’ve placed your products in front of a white background and you’re ready to shoot.
Great job! The only other thing you need to do to set up your smartphone camera is make sure your phone is fully charged and that you have enough space on your phone so you can take as many pictures as you would like.
3. Choose Your Source of Light
It doesn’t matter whether you choose artificial or natural light, you need to get it set up so that your pictures look consistent. Artificial light is easier to control because the sun can always change positions or disappear behind some clouds. If this happens, the light inside your home or office will change, making it difficult for you to keep the images consistent.
Natural light is great for lifestyle photos or if you don’t have too many items and don’t need too much time to take the pictures. But if your products are small or you have too many products to shoot, artificial light is probably the better choice.
4. Set Up a Background
If you’re creating images on a white background, the best option is to create a photography sweep. You can use white paper sheets to make one fairly easily. This video shows how to create a sweep background at home and also has some good tips on how to take amazing product photos using items you already have.
If you prefer to do something more involved or more creative, I recommend just typing “photography backdrop DIY” into the YouTube search bar and you’ll find tons of tutorials on how to make creative backdrops for your photos.
Whichever backdrop you decide to use, just make sure you’re positioning it near the source of light – especially if you can’t move your lights or you’re going to use natural light that comes from a window.
5. Soften the Shadows
When you have just one source of light, it can make your photo look flat and it might lead to too much shadow. So, try to make sure you have two sources of light, ideally coming from a diagonal position on both sides of the subject.
If you don’t have two sources of light, you can use a reflector to make the light bounce back at your subject from the other side. This small step will make your product images look way more professional.
6. Position your Products
Once you have set up your background and the lights to guarantee you have soft shadows, it’s time to position your product.
I always start by just putting the item right in the middle of the frame and taking a picture. Then, I see how it looks. If you don’t love it, just move the product a little bit and try again. This is definitely a bit of a trial and error process, so keep moving your product until you’re happy with the result.
Once you’re done, add a small mark on the backdrop or floor with a pencil. This will help you ensure that you position each shot the same if you’re doing a batch of photos. You won’t have to keep positioning the item and the lighting whenever you set up a new shot.
7. Create Different Images for One Product
As I’ve said before, people want to see your items in every angle possible. If you’re selling purses, they want to see them from all sides, including the bottom and the inside. They want to see every angle and every little detail.
Say you’re taking pictures of food for your restaurant. You will want to show multiple angles of the dish, and you can also style the images with the ingredients used to cook the dish and some utensils that look good on camera like wooden spoons, beautiful plates, cups, and mugs.
If you’re not sure how many photos to take, look at a big competitor’s website and get some inspiration on how they showcase their products. There’s nothing wrong with getting inspired by other people who have nice pictures. Just get inspired and create your own, in your own way!
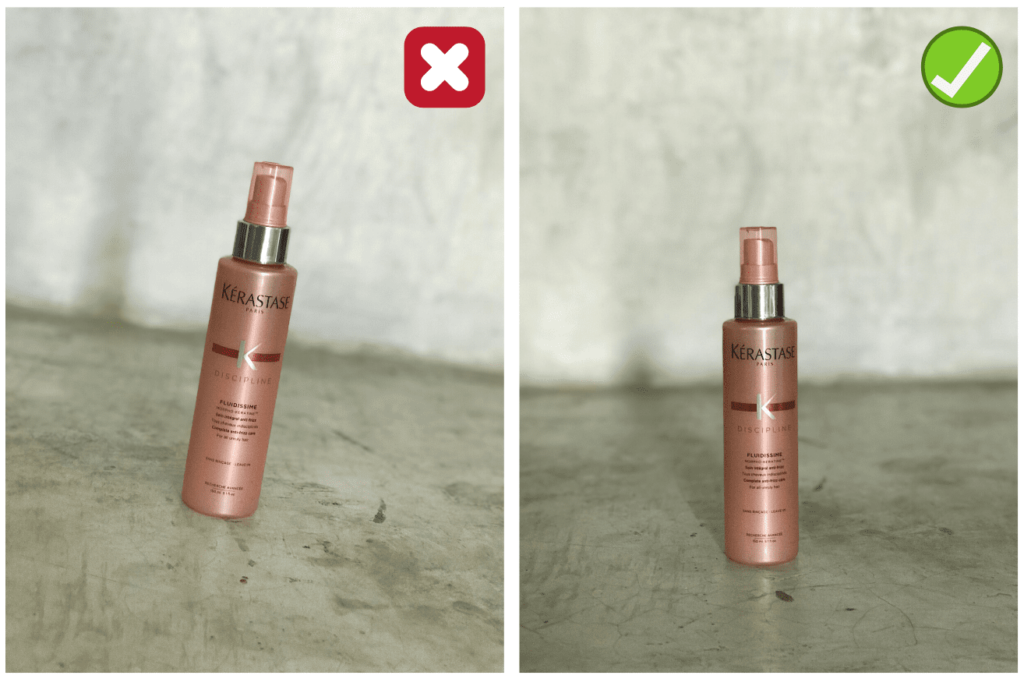
8. Use Portrait Mode
If you’re creating product photos with models, for jewelry, cosmetics, or maybe eye-wear, it might be fun to try using the portrait mode on your phone (if your smartphone has this feature).
The portrait setting creates photos that have a nice blur on the background and focus more on the subject. However, if you’re shooting product photos against a plain background, there’s no need to use this feature.
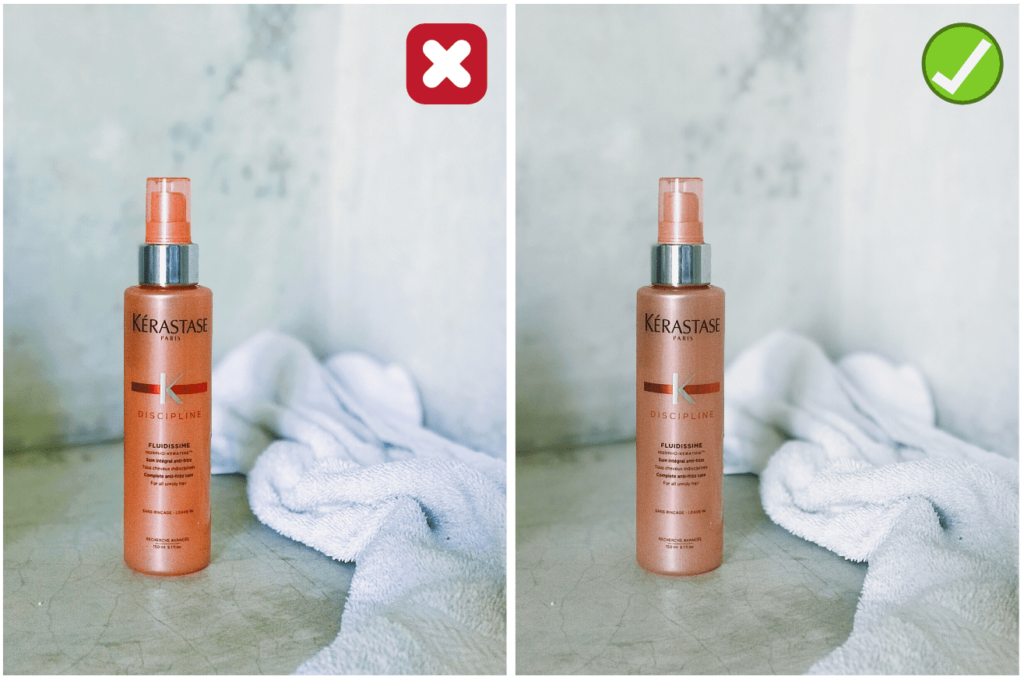
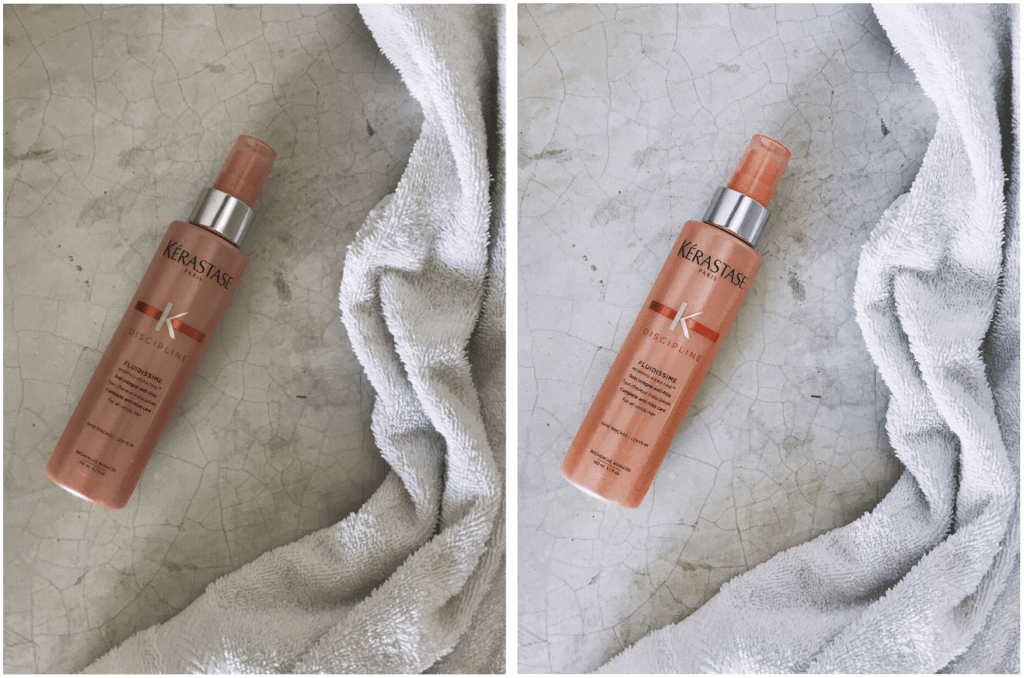
9. Edit Your Photos
This is one of the most important tips for product photography and for photography in general.
People usually underestimate the power of editing. Some think that it’s inauthentic and that they just want to showcase the subject of their photo exactly the way they are. I get that, but cameras sometimes aren’t great at showing things exactly as they are in real life… no matter how good your camera is.
The colors can get a little washed out, the contrast might be a little off, or something might not “pop” as much in a photo as it does in real life. You can help get that back with some simple photo editing. We’re not talking anything too time-consuming here. It will probably only take a minute or two per photo to tweak it slightly and make it the best it can be.
In product photography, you might find that the white background isn’t white as it is in real life. This happens because cameras automatically adjust the configurations so that the whole image looks “neutral.” Because it’s compensating for too much white, it makes the background a little more grey. More than likely, your product will also change tones and you may lose a bit of saturation, too.
How can you fix this? Easy! You need to edit your images so they can be beautiful and bright and show exactly how things are in real life. Be careful, though. If you prefer a natural photo, less is more. Don’t overdo it. After all, you don’t want to mislead anyone. Make sure the colors look as close to the real-life product. as possible. Try to choose a filter that doesn’t change your colors too much.
When you post photos on your online store or your social media account, you want everything to look consistent. Try to use the same filter or edit the photos in the same way so they all end up looking the same.
There are so many good apps out there to edit your photos quickly and easily. My favorites are Snapseed, VSCO, and A Color Story.
Creating quality images to showcase your products is an essential step to help people see your company as a business they can trust. So, invest some time in your product photos and make sure they look super professional.
Did you like these tips?! Then don’t forget to save the image below in your “How to Take Better Photos” board on Pinterest! Also, check out our Pinterest page and follow us to get daily updates + digital marketing and social media tips for small businesses!
We can’t wait to see what you do. Please tag us using the hashtag #GrowingMyBiz so we can see and share your work!