
If you are a local business owner, you probably already know how important Google is to drive customers to your door. If you want customers to be able to easily find out information about you online — whether it’s through a knowledge panel, a map list, or Google Maps results — you will need to create a Google My Business account.
Keep reading to find out:
Why Do You Need a Google My Business Account?
If you’re a small business owner, there are a few big reasons why you need to have a Google My Business account.
Get Found: The main reason you should have a Google My Business account is to help customers find you. If you’re not on Google, you basically don’t exist these days! People often use Google and Google Maps to search for the items and services they need, so you better make sure you’re there.
Build Trust: Research shows that customers are 70% more likely to visit a business that is listed on Google My Business. Being present and having a complete profile will not only increase your chances to be shown to more people on this major search engine, but it also helps people to know your business is legit.
Give Information: Your business needs to be an open book to your customers. They need to easily be able to find all the information they need to be able to contact you, visit you, see your hours and read reviews. Having a hub for all this information will make it easier for people to make a decision about your business and hopefully become a customer for life!
Who Should Get a Google My Business Account?
You’re probably wondering if your business fits the criteria to create a Google My Business account. Chances are, you probably do. Whether you have a brick and mortar business that people can visit or you have a physical office that you work out of and schedule appointments at occasionally, you should get a Google My Business account.
For example, if you’re a nail artist, hairdresser, makeup artist, photographer, painter, handyman, pool cleaner, gardener, dentist, doctor, yoga studio, restaurant, etc. you should definitely set up a business listing on Google My Business.
Is Google My Business Free?
Yes, listing your local business in Google My Business is 100% free. You don’t need to pay for anything, and the whole process is so much easier than you probably think.
In this post, we’ll show you how to claim your business listing and teach you how to optimize it so customers can easily find you when they perform a search.
How to Create Your Google My Business Listing
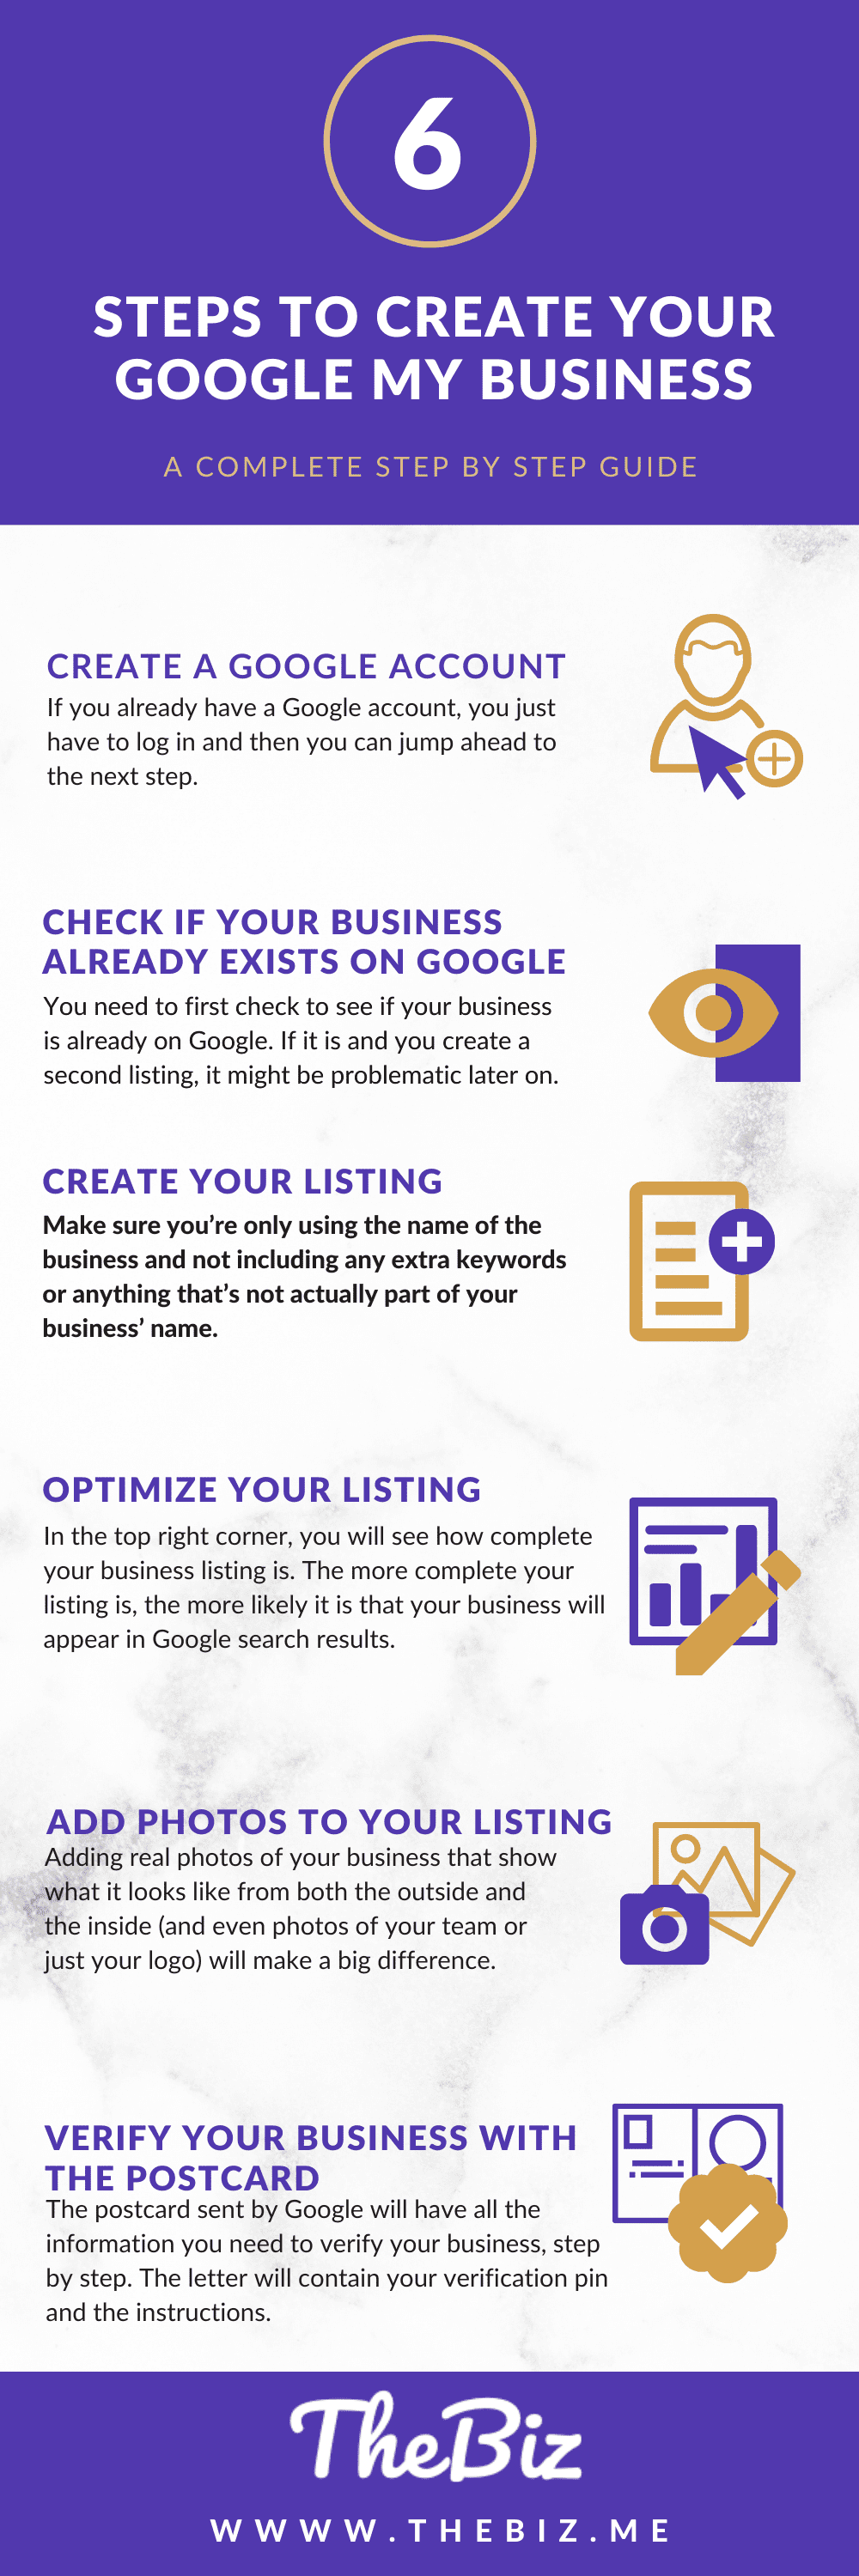
1. Create a Google Account
If you already have a Google account, you just have to log in and then you can jump ahead to the next step. If you don’t have a Google account, you’ll need to create it first before you can create your listing.
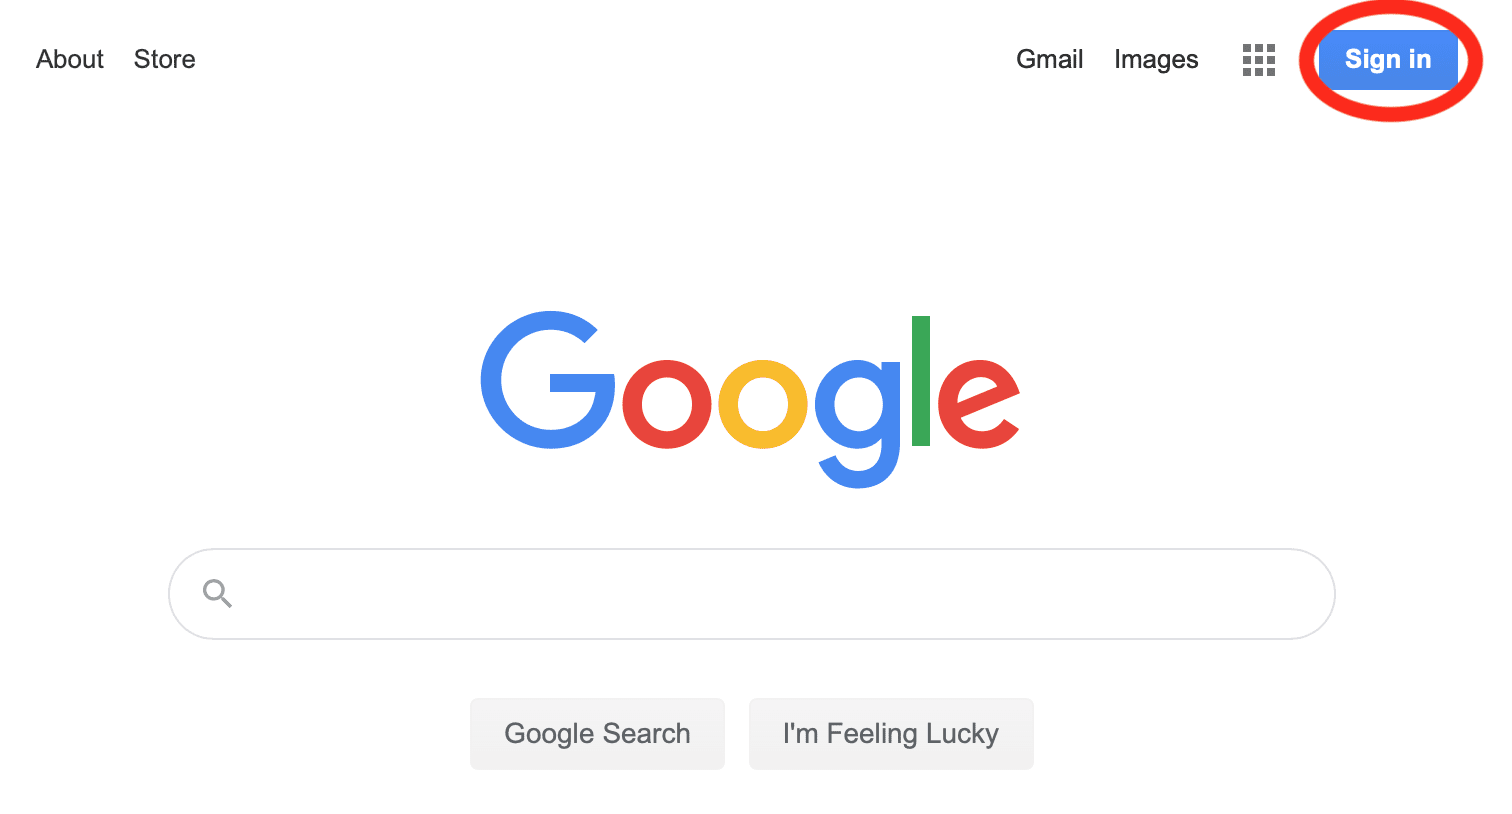
Go to google.com and click “sign in” in the top right corner.
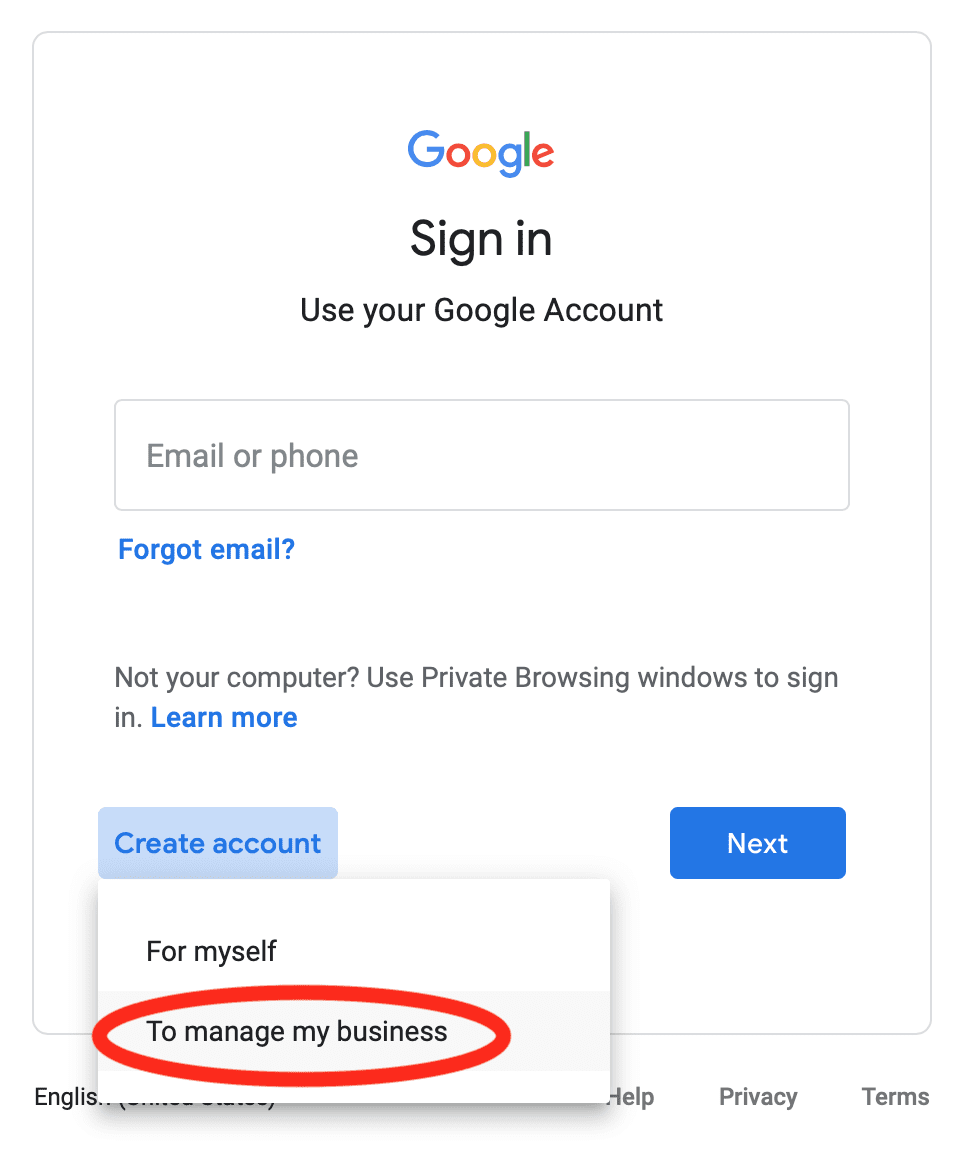
Then, click on the “create account” link and then choose “to manage my business.” If you don’t see a drop-down menu, it’s ok. Just select “create an account.”
On the next page, you will fill out the form with your business’ data and create an email address and password. If you already have an email address that you use for your business, you can just click on “use my current email address instead.” This will make everything simpler so you don’t have to manage multiple email accounts.
After entering your password, click “next.”
At this point, you will be emailed a verification code which you’ll need to enter on Google to complete the process. Once you do that, click on “verify.”
Complete the process by adding the remaining data: phone number, date of birth, and gender.
On the next page, read and confirm Google’s terms and conditions and click “create account.”
Once the process is complete, stay logged in and move onto the next step!
2. Check if Your Business Already Exists on Google
Even if you’ve never created a listing before, it’s possible that your business already exists on Google, especially if your business has been open for many years. A similar thing can happen on TripAdvisor, as you can read in this article. So, you need to first check to see if your business is already on Google. If it is and you create a second listing, it might be problematic later on.
So, how can you confirm if your business already exists on Google? Go to google.com and type your business name and your location (the city or neighborhood). You can also type your business address or your business phone number. You can also try searching on Google Maps just to make sure.
Your search can come back with one of these three results:
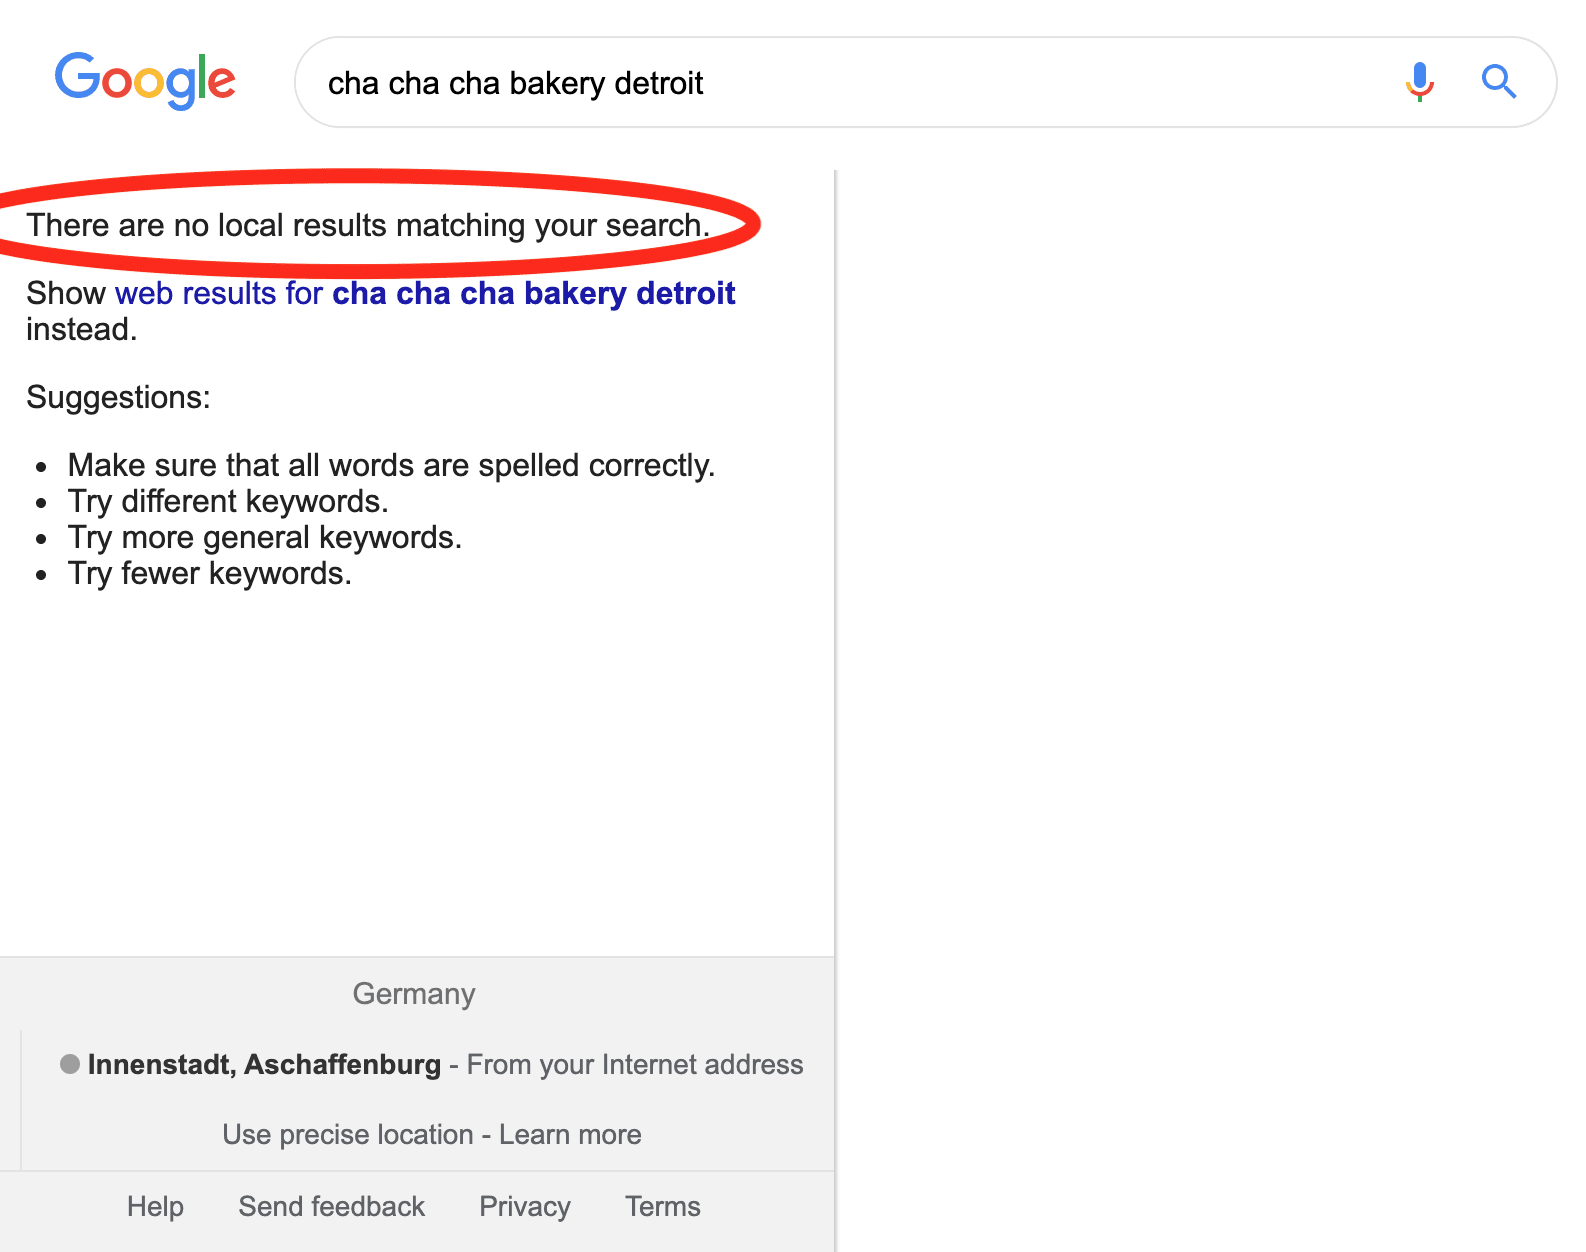
A. Your Business Is Not Listed
If no results come up, it means your business is not listed yet and hasn’t been created. If this is the case, you can safely create your listing.
B. Listing Unclaimed
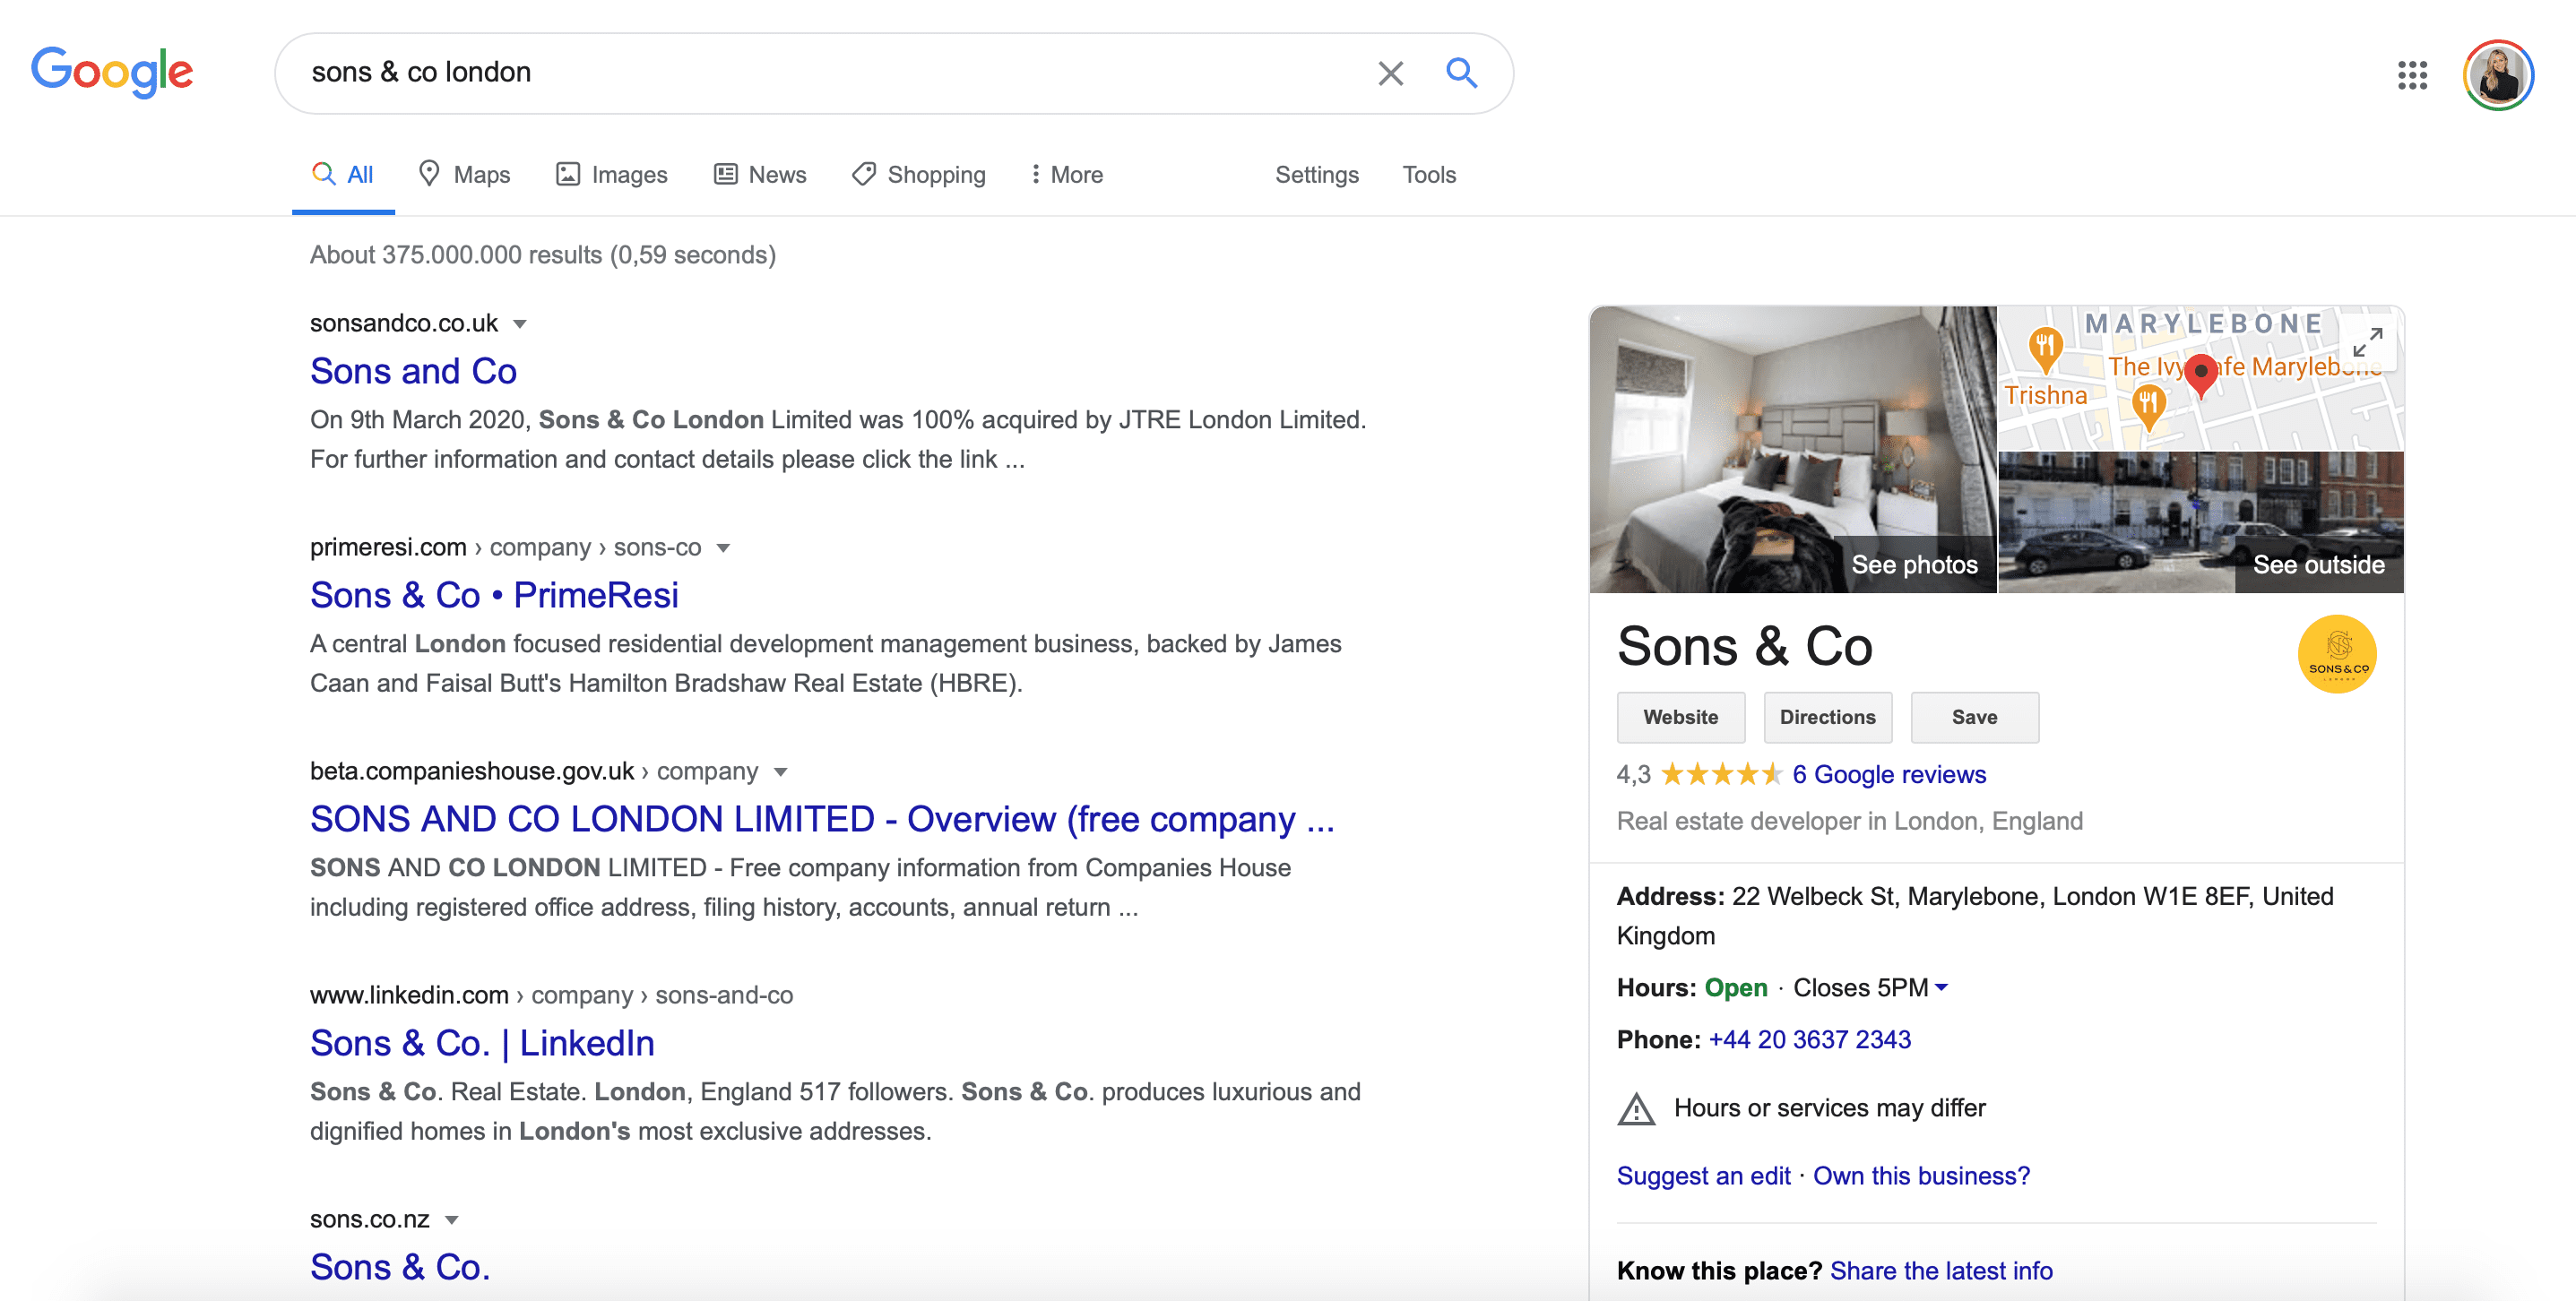
The second possible scenario is that your business is already listed but it hasn’t been claimed. How will you know if this is the case? Look at the knowledge panel (as shown in the image below) and see if there’s a link that says, “Own this business?”
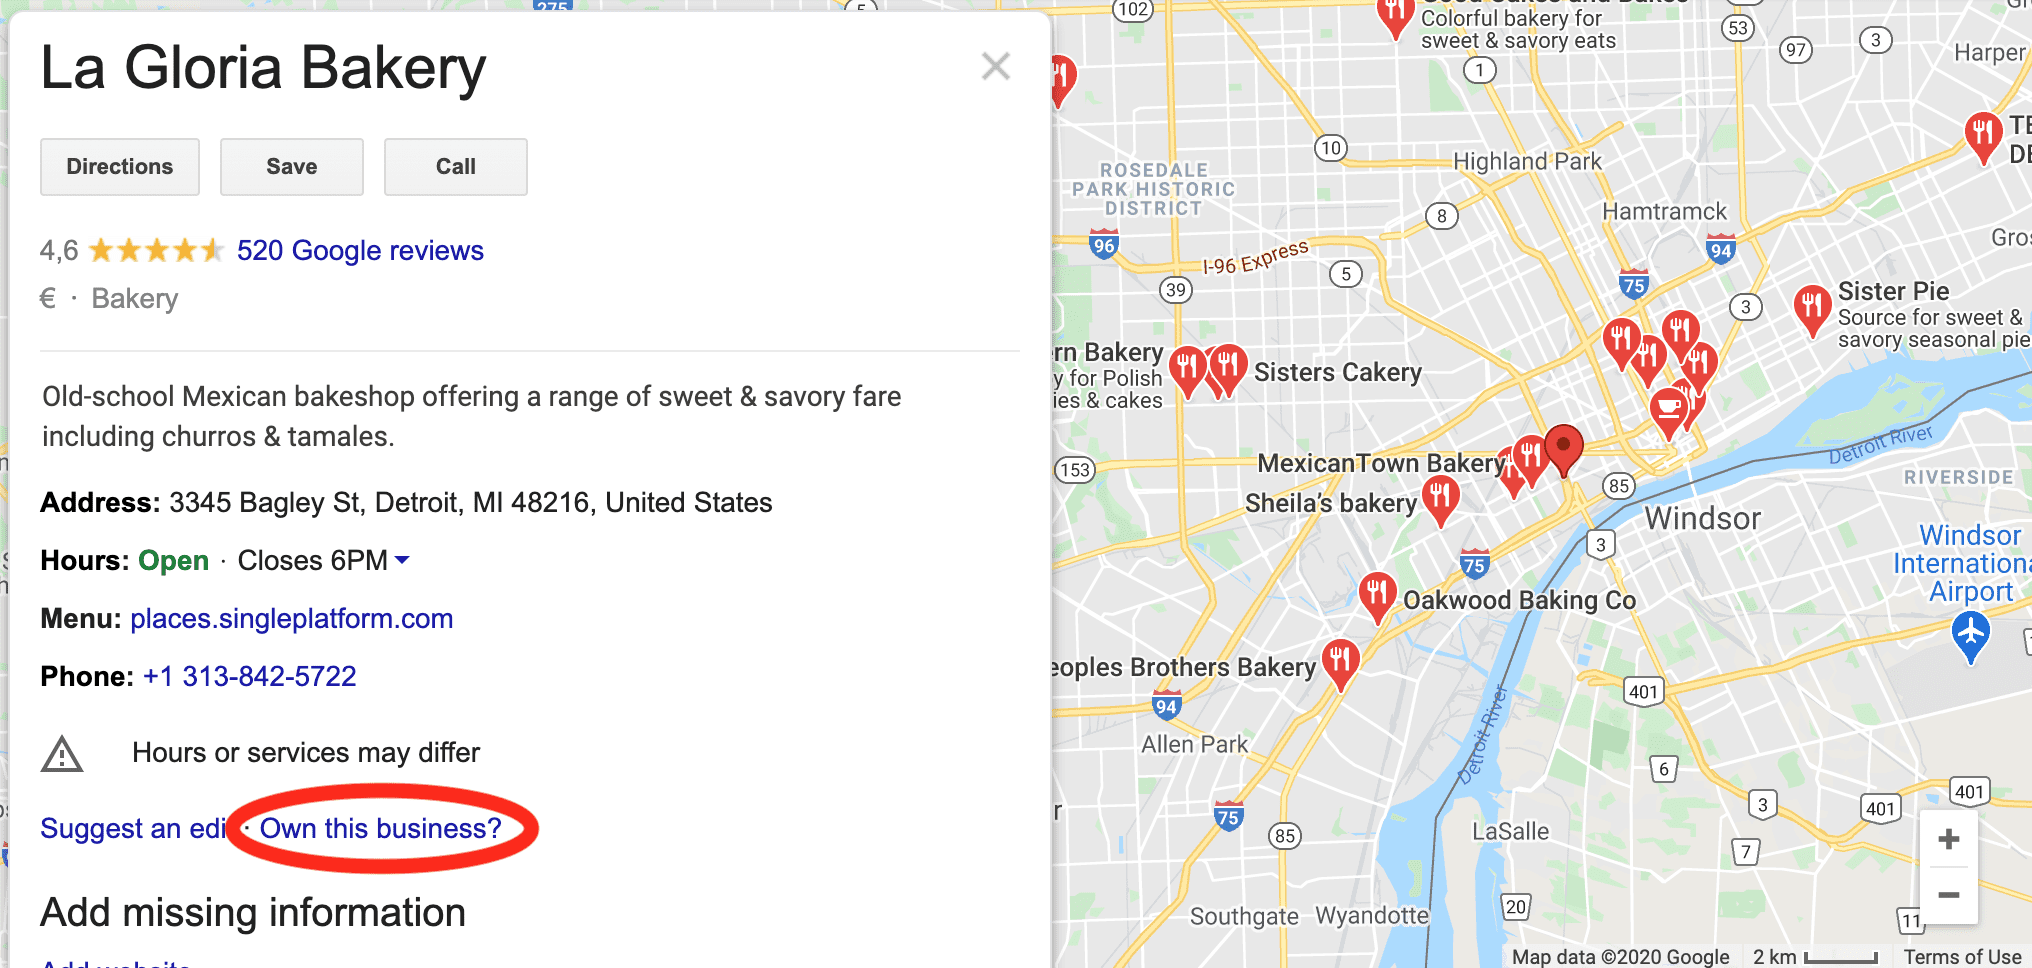
If you see that, the business listing is unclaimed. Just click the link to start claiming your business, then skip to step four.
C. Your Business Has Already Been Claimed
If your business doesn’t show the “Own this business?” link but it shows up on Google, it means that it has been claimed. If you didn’t claim it, perhaps a former employee did. If possible, reach out to the person who claimed the listing and ask them to change the listing ownership to you.
If this doesn’t work or you don’t know who created the listing, you can request the ownership of a business on Google.
3. Create Your Listing
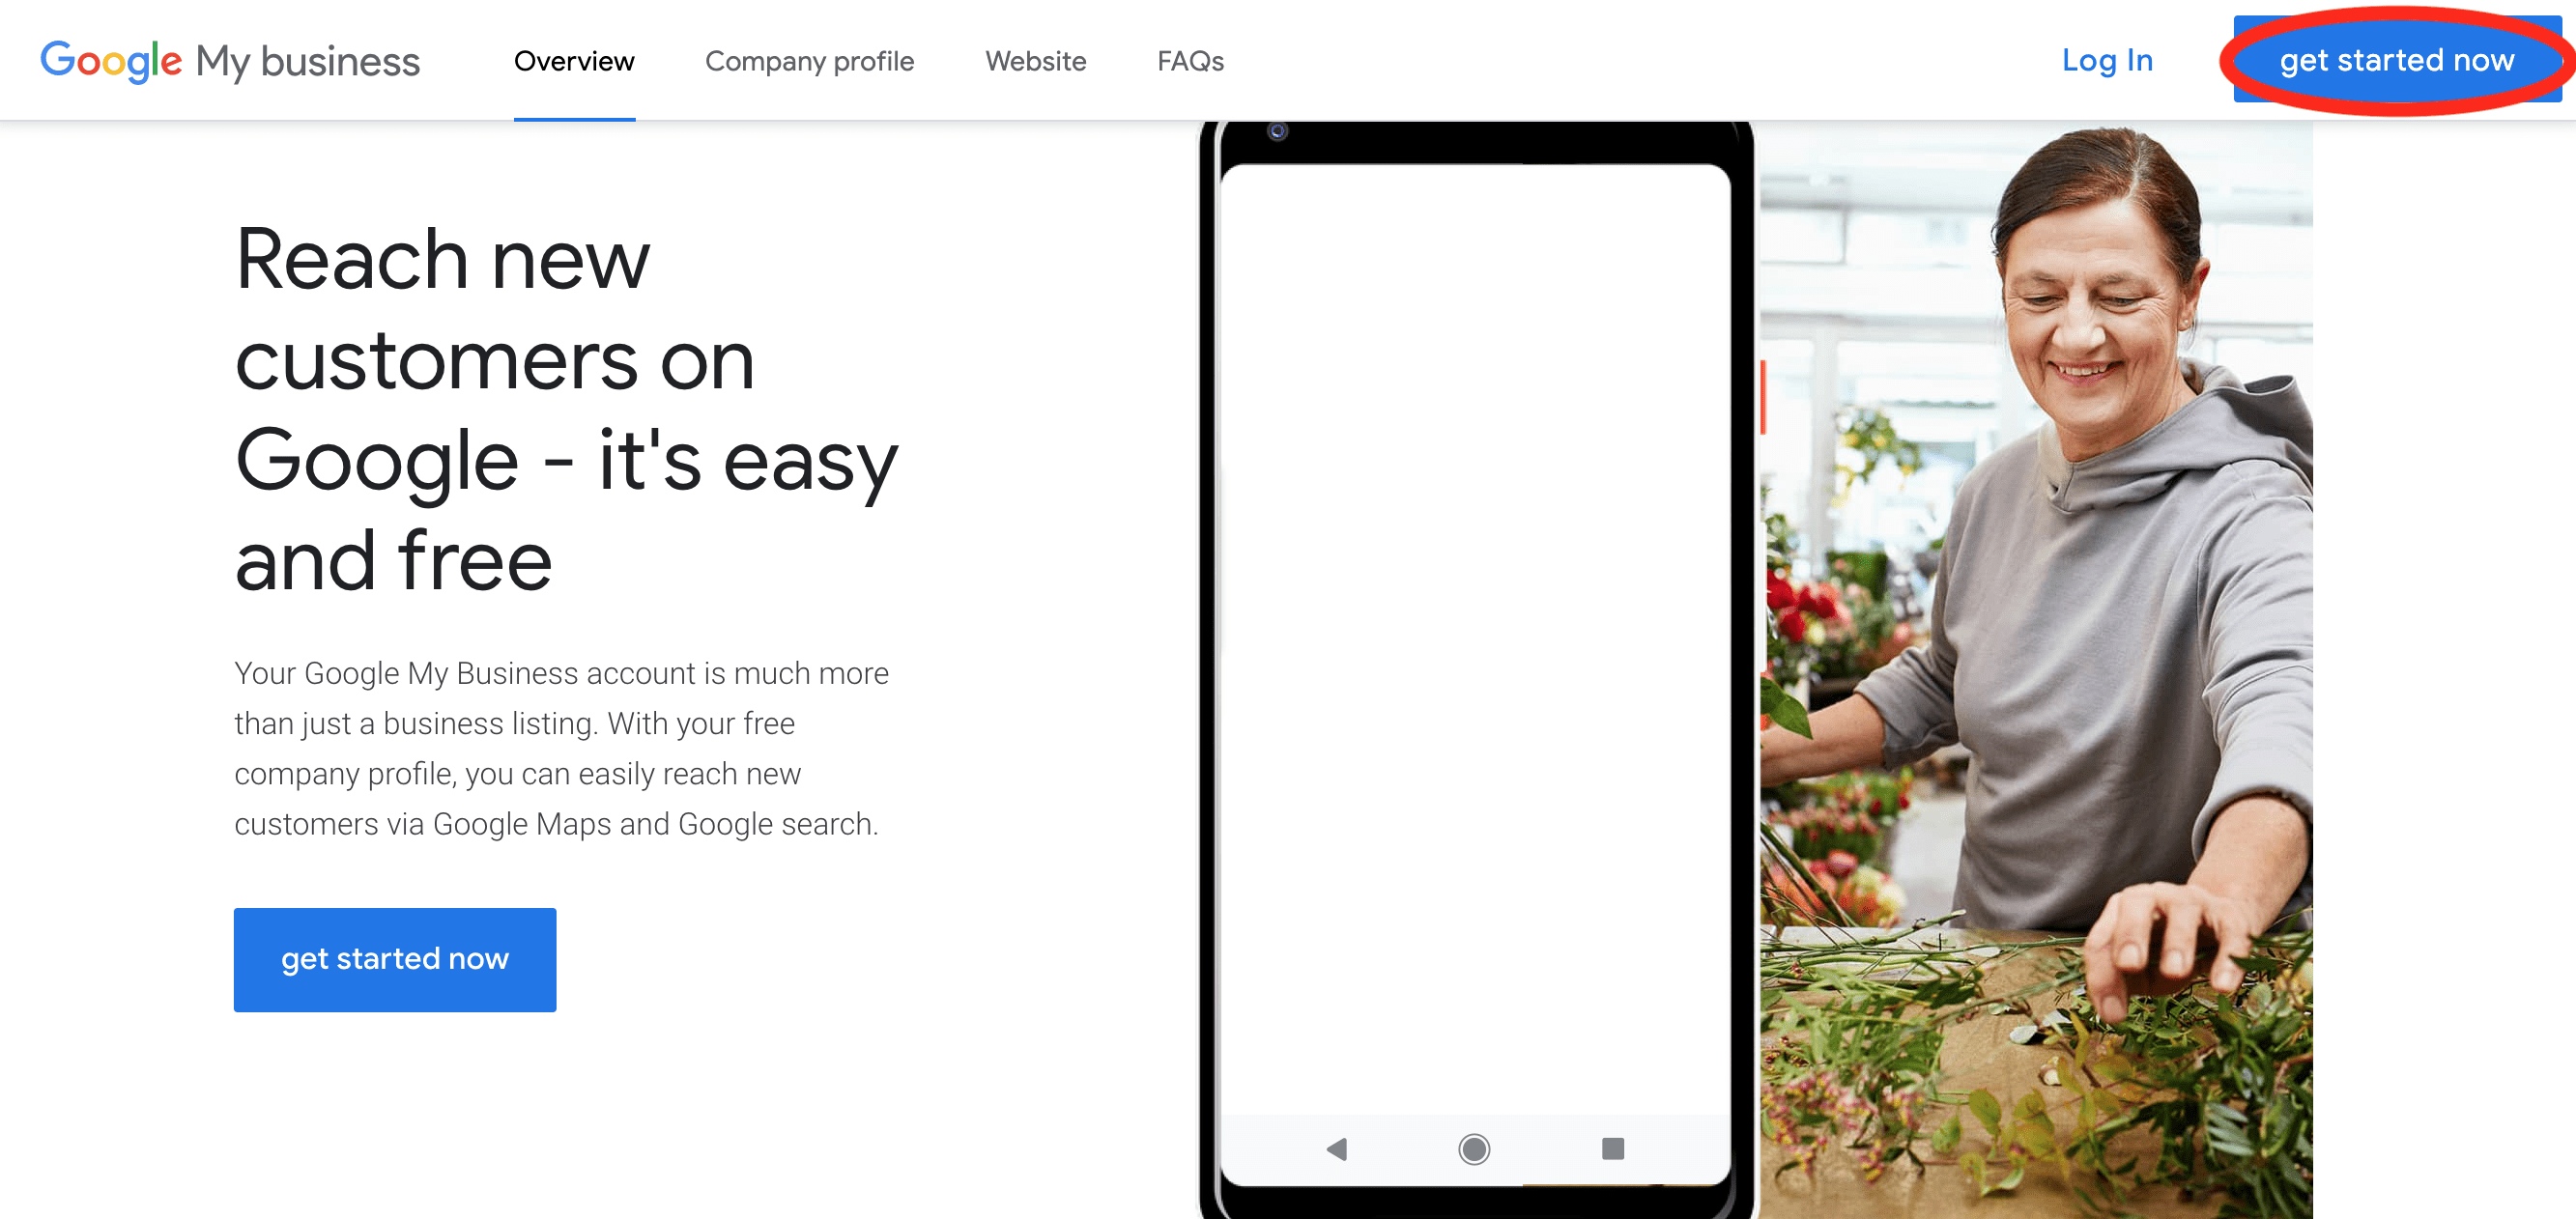
If you don’t have the business listed on Google already, head over to http://google.com/business and click “start now.” This will start the setup process.
On the other hand, if you are already listed on Google but need to claim the listing, click on the “own this business?” link and you will be taken to the same page, but many of the information fields will be pre-filled. Just go through each field to make sure it is all accurate and fill in any missing information.
Here’s what needs to go in each field:
First, your business name. Make sure you’re only using the name of the business and not including any extra keywords or anything that’s not actually part of your business’ name. Do not include the city, neighborhood name, or anything like that unless it’s actually part of the business’ name.
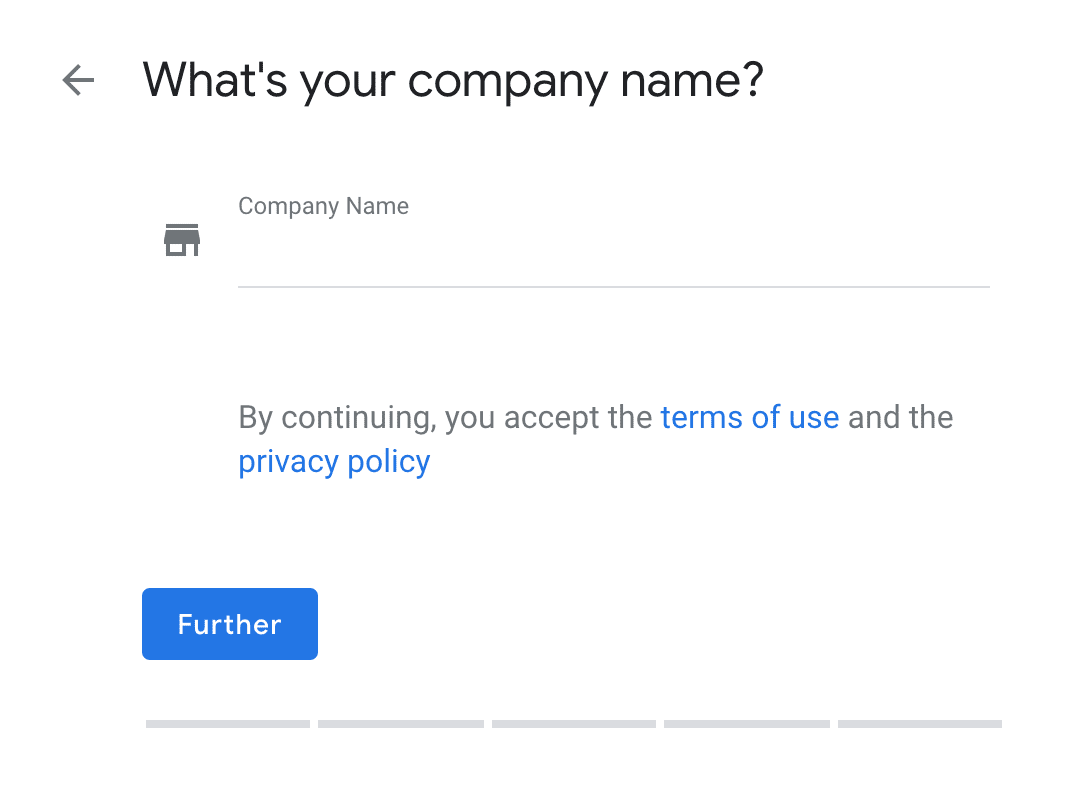
According to Google’s Guidelines for representing your business on the platform, “including unnecessary information in your business name is not permitted, and could result in your listing being suspended.”
So, once you’ve added your business name, click “next.”
On the next page, you will need to choose the category that best fits your business to help customers find you on Google. So, let’s say you own a supermarket and someone searches for “supermarkets” on Google. If you’ve chosen “supermarket” as your business category, you will show up, even if your business name doesn’t include the word “supermarket.” This helps new customers who don’t even know your business’ name to still find you.
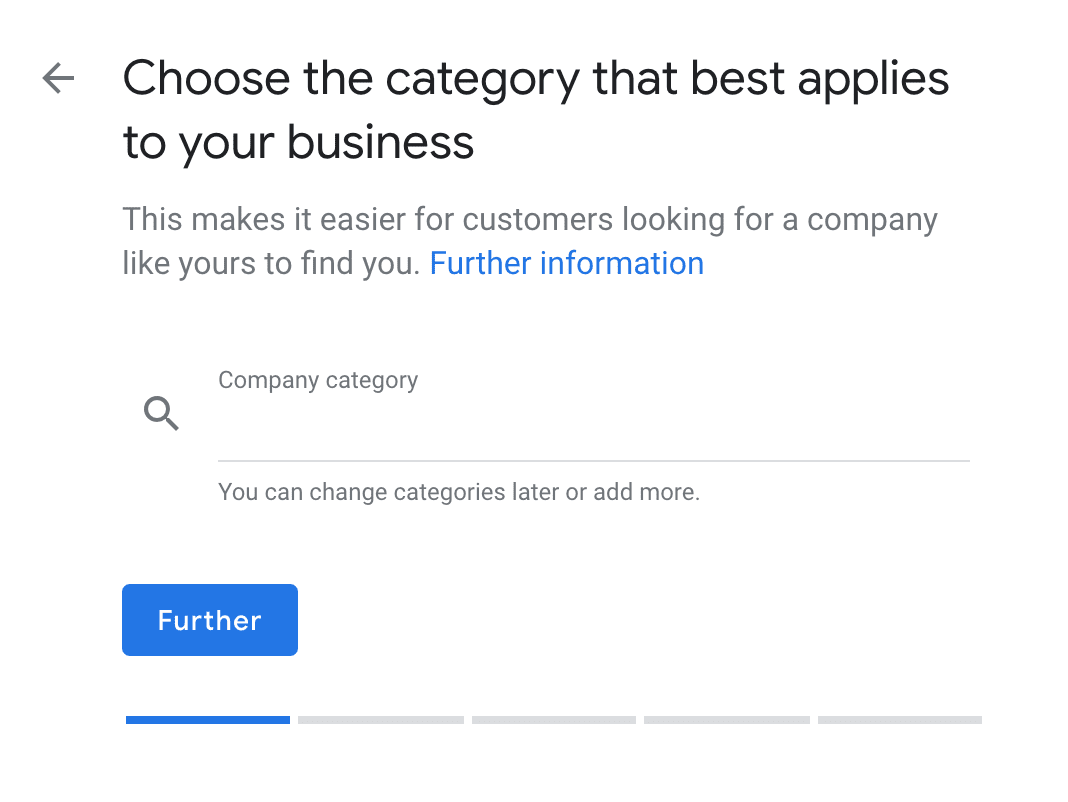
This first selection will be your primary category, and this is one of the most important steps so far. Google Business categories are very important ranking factors when it comes to displaying your business in Google search results. You can only choose one category for your business when you set up your initial listing, but don’t worry. You get to choose more categories in step four when you start optimizing your listing further. So for now, just start typing the category name that you think fits your business best and Google will start to autocomplete some category suggestions for you. Once you’re happy with your choice, click “next.”
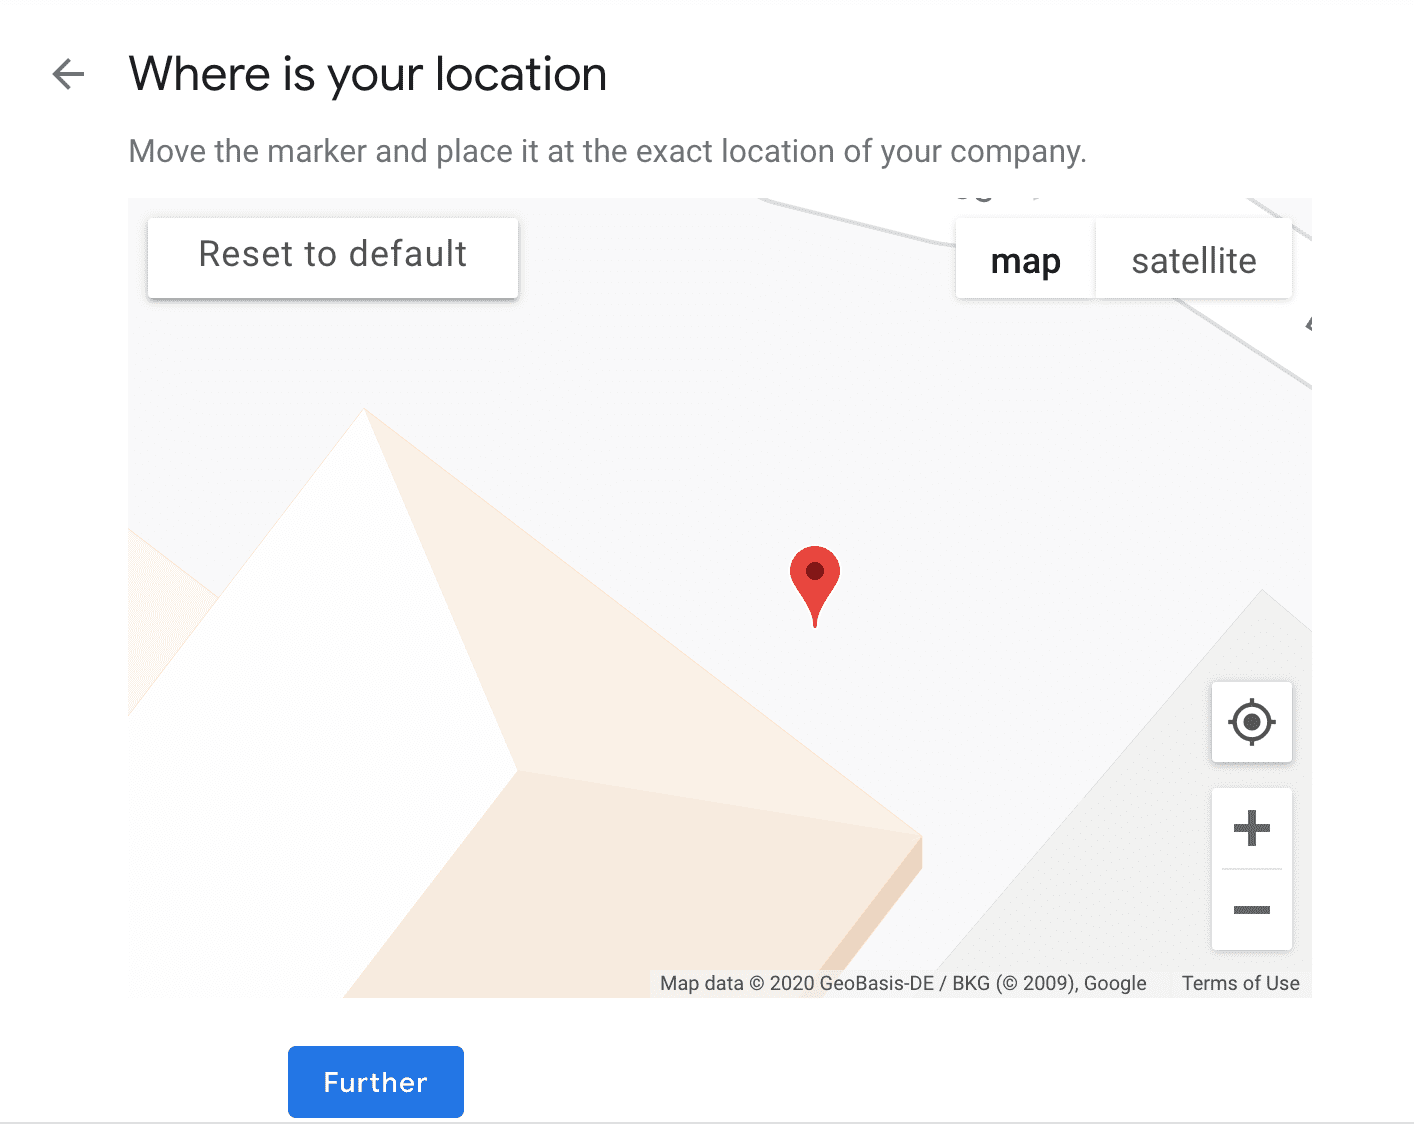
After that, you’ll be asked if you want to add a physical location where customers can visit, like a storefront or office. This location will show up on Google Maps and Search when customers look for your business.
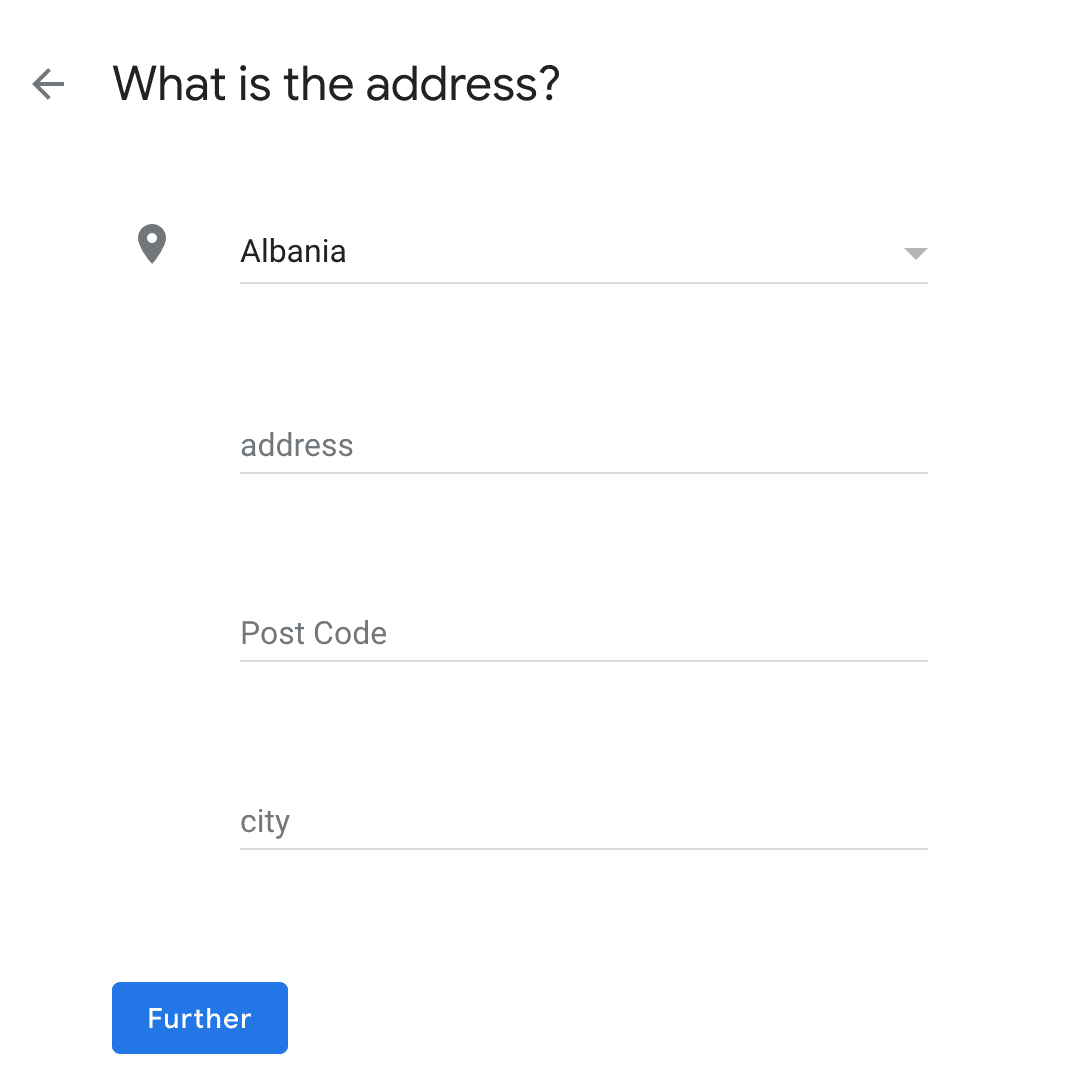
If you own a brick and mortar shop that allows customers to come inside your business – even if you occasionally offer delivery services (like a beauty salon, a restaurant, a catering company, etc.) you should choose “yes” and fill out the address.
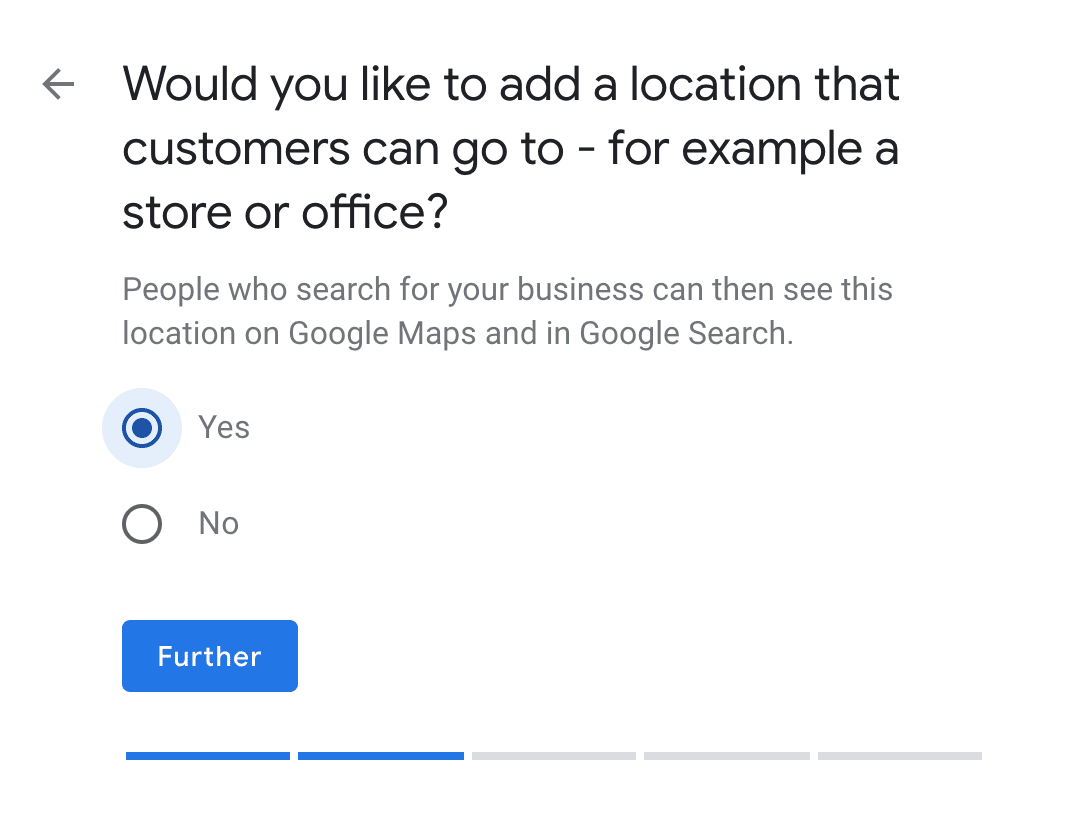
If you own a business but you don’t see customers at your physical office location (like a plumber, a pool cleaner, gardener, etc.) you should select “no” and skip this step completely.
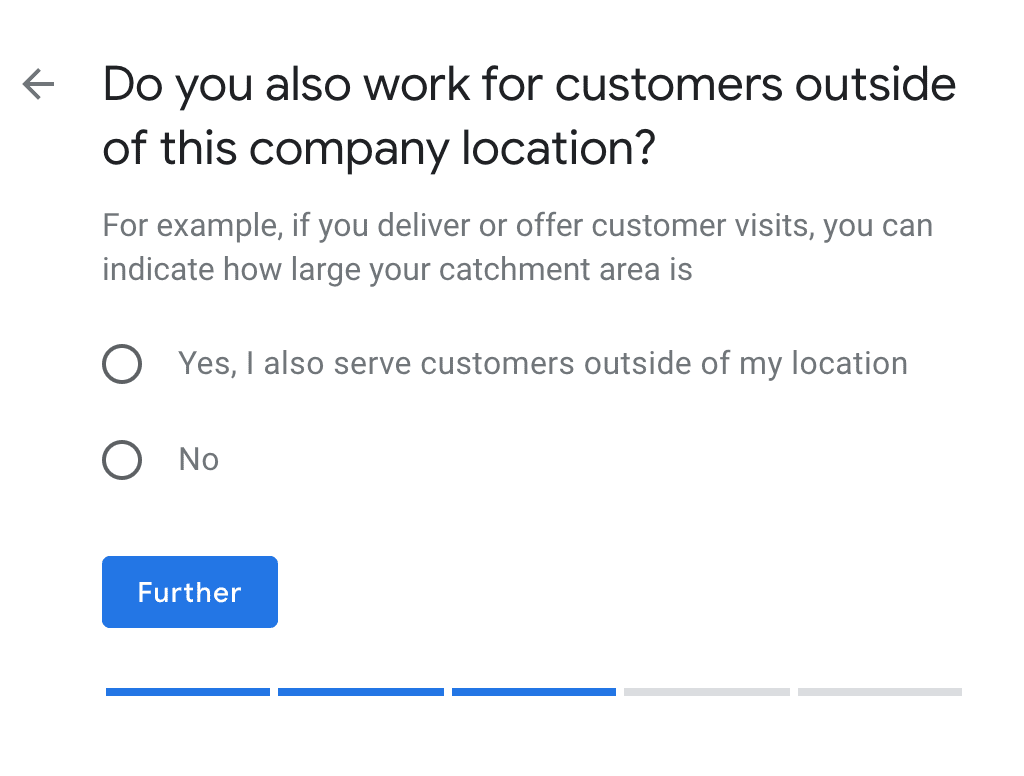
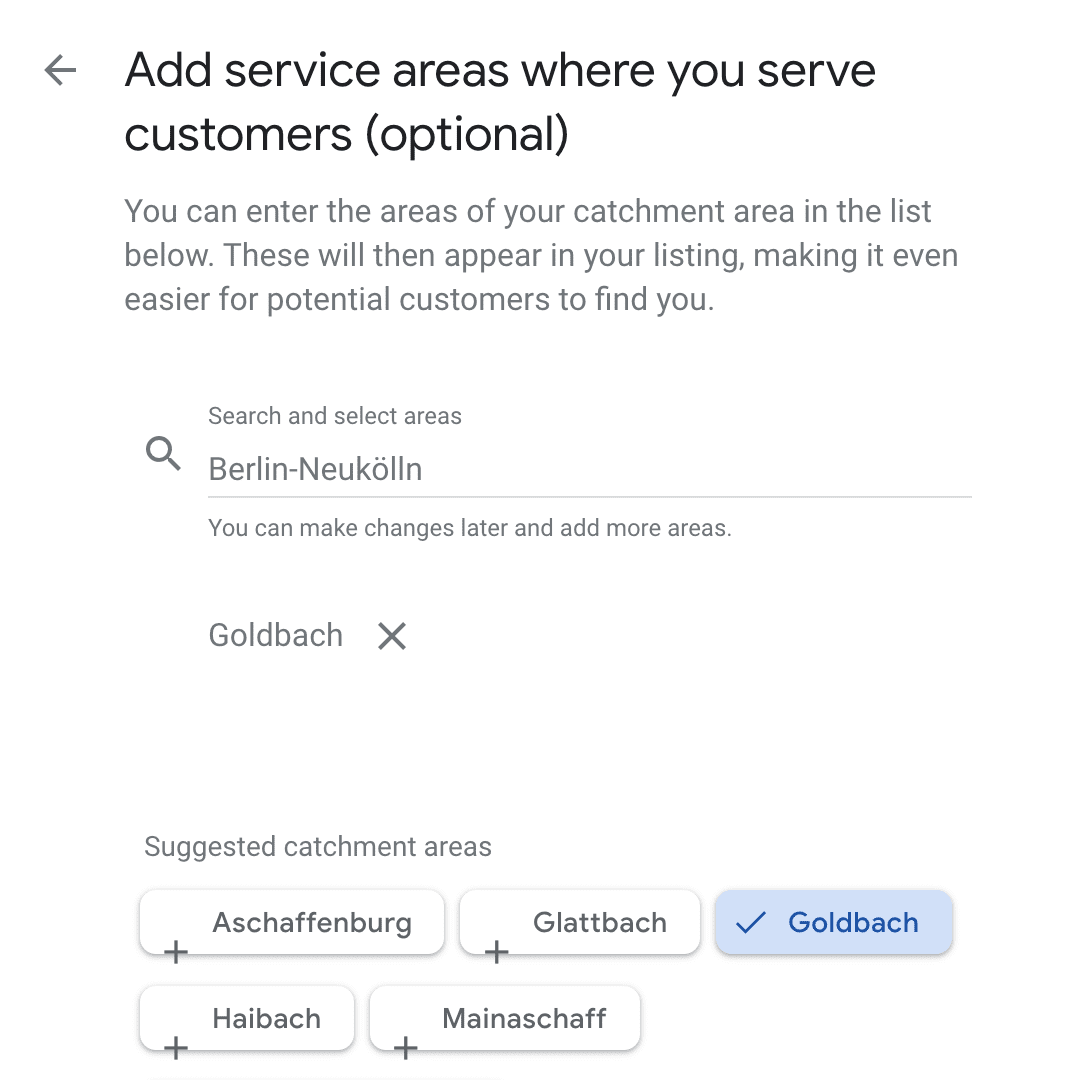
After the location, you will be asked if you also serve customers outside your location. For example, maybe you own a restaurant that delivers or a photography business. In this case, choose “yes.” On the next step, you should choose the area where you deliver to customers using cities or ZIP codes and then click “next.”
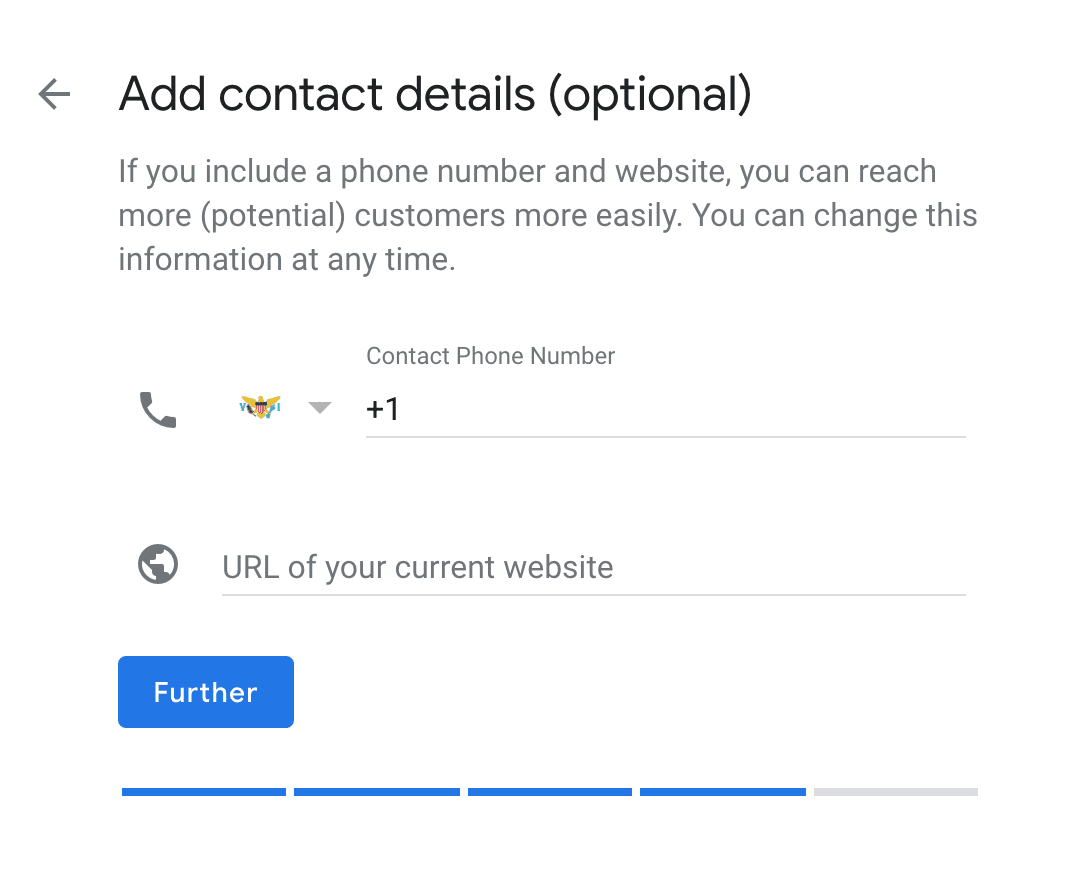
Now you’re going to fill out the contact information that people will see when they look at your business listing. Include your business’ phone number and website in this section.
If you don’t have a website, Google offers you the option of creating a free website based on the information that you have included on your Google My Business account. This will be a very basic website, so we strongly recommend creating a professional website on a platform like WordPress instead. Once you have your phone number and website URL entered in, click “next.”
After that, you will see a confirmation screen that shows you everything you have entered in. Take some time to review it and make sure there aren’t any mistakes. It’s so much easier to fix typos now than it will be later on. If everything looks good, you’re ready to let Google verify your business. They do this by sending you a postcard in the mail with a verification pin and instructions for completing the signup process.
Add your name and click on “mail” to confirm that you’re ready for them to send the postcard to the address you listed for your business. If you haven’t specified an address, you’ll be able to do so now. Keep in mind, the postcard can take up to five days to arrive but once you receive it, you’ll be able to finish the Google My Business signup process.
If you want to use your time wisely, you can use this five day waiting period to optimize your listing.
4. Optimize Your Listing
Once you’re done confirming your address to receive the postcard in the mail, you will see the option to continue. Click on “continue” and you’ll automatically be redirected to your Google My Business dashboard. If it doesn’t work, just go to https://google.com/business and enter your login information.
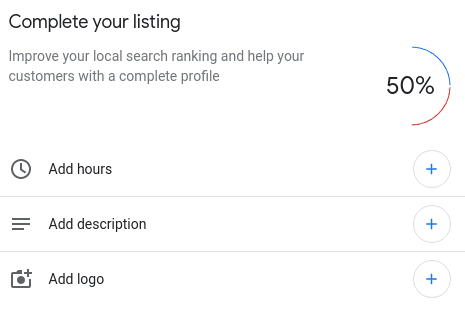
In the top right corner, you will see how complete your business listing is. The more complete your listing is, the more likely it is that your business will appear in Google search results.
If you want to add more to your listing, click the “info” option on the left menu. Here, you will see all the information you previously entered when you registered your business. You will also see areas where information is still needed. You can modify anything by clicking on the pencil located next to each item. For example, if you filled out your business name incorrectly – by adding keywords or cities that shouldn’t be there – you can change it now.
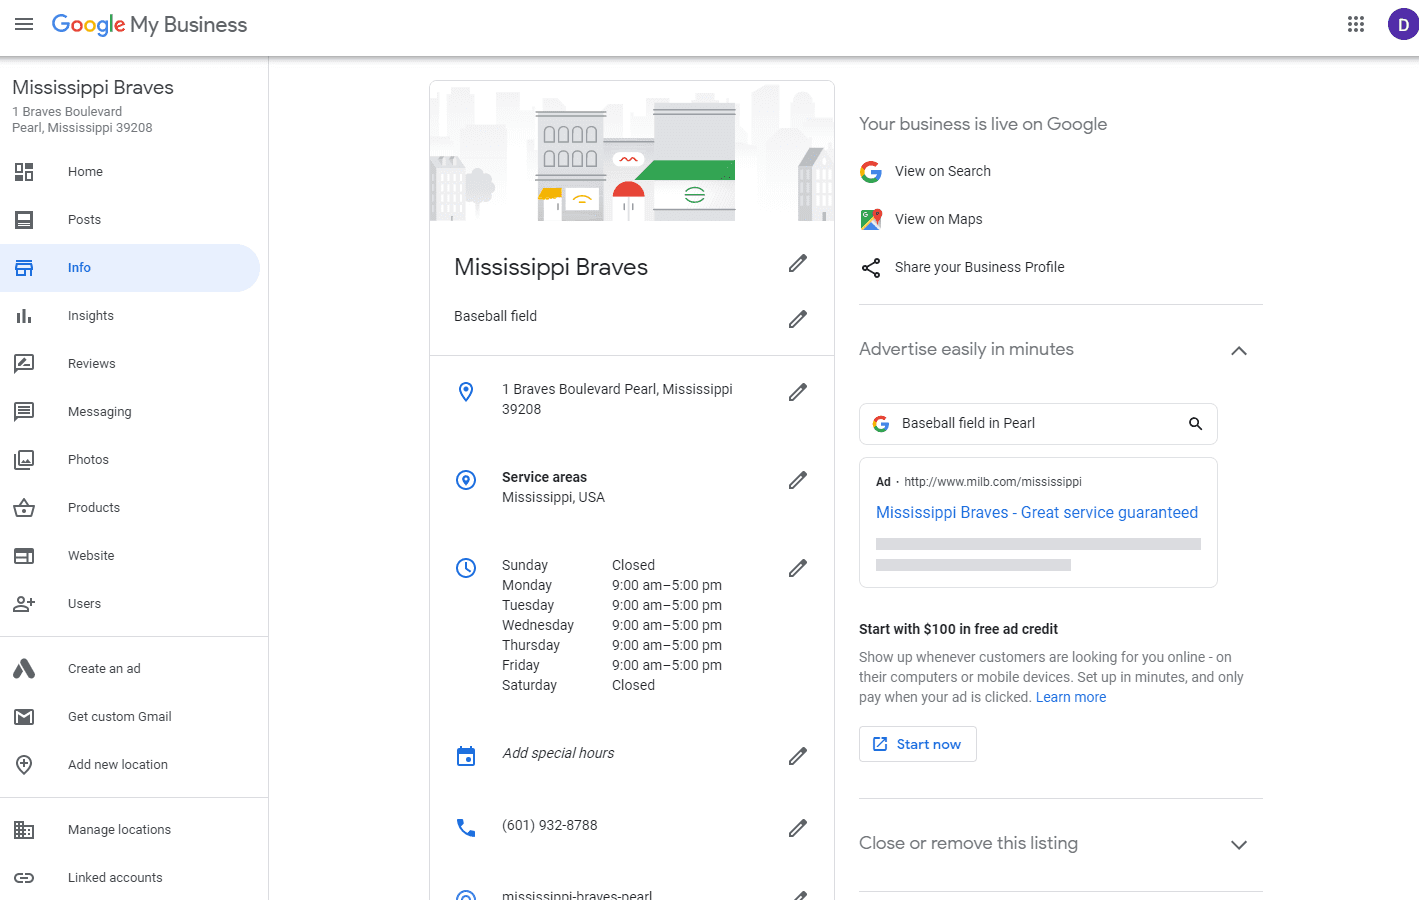
You’ll also see the category you chose when you set up the account. Even if you don’t want to change the category, you can click on the pencil icon to add additional categories. You don’t have to do this, but it is recommended. For example, let’s say you own a beauty salon that offers both hair and nail services. You can go ahead and add the second category here.
Only add categories that are relevant to your business. Don’t try to add a bunch of keywords that are just tangentially related to your business thinking it will help you reach more people. It will actually have the exact opposite effect and can frustrate people who won’t be able to tell exactly what you offer.
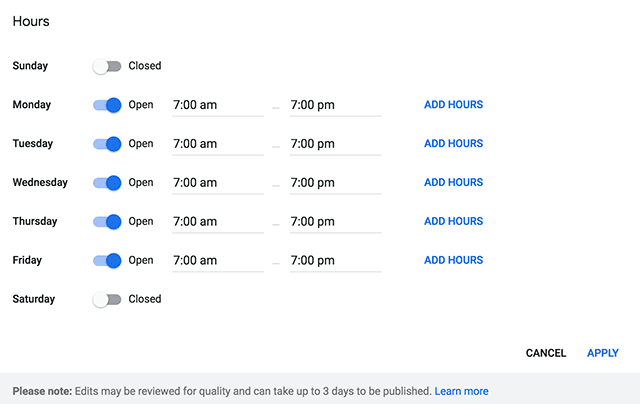
After you’re done with the category section, you can go ahead and add your business hours. Choose which days you’re open and enter the hours you are open. Remember to also set up your special hours, like federal and bank holidays, and any other days your operating hours might change.
If people need to make appointments to visit you, make sure you add a URL for your appointment page or online calendar. If you have a menu that you want to share, add the URL to that page too.
Google also gives you the opportunity to add your services, a description of the service, and the price right to your listing. However, be aware that this option will only show up when people search for you on the Google Maps app.
You can also optimize your listing to add some attributes, for example, whether or not there’s a public restroom, free parking, wheelchair access, which payment types are accepted, and more.
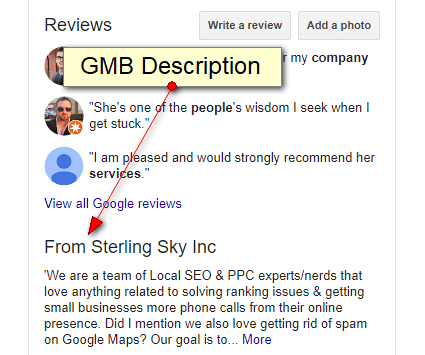
Finally, don’t forget to add a business description. This space is not meant to be stuffed with keywords, links, or hashtags. Your business’ description will not impact how you are ranked by Google’s algorithm. Instead, just focus on giving people valuable information about what you do and why people should choose your business.
After you’ve set up all these options, don’t forget to add your business’ open date – even if it has already been open for years.
5. Add Photos to Your Listing
Once you’re done optimizing your business listing’s details, it’s time to add some photos of your business to it. Adding real photos of your business that show what it looks like from both the outside and the inside (and even photos of your team or just your logo) will make a big difference.
People usually click through these photos to decide if they are going to visit a business or not. You don’t have to hire a professional photographer, but try to take appealing, well-lit photos to entice people to choose you over the competition.
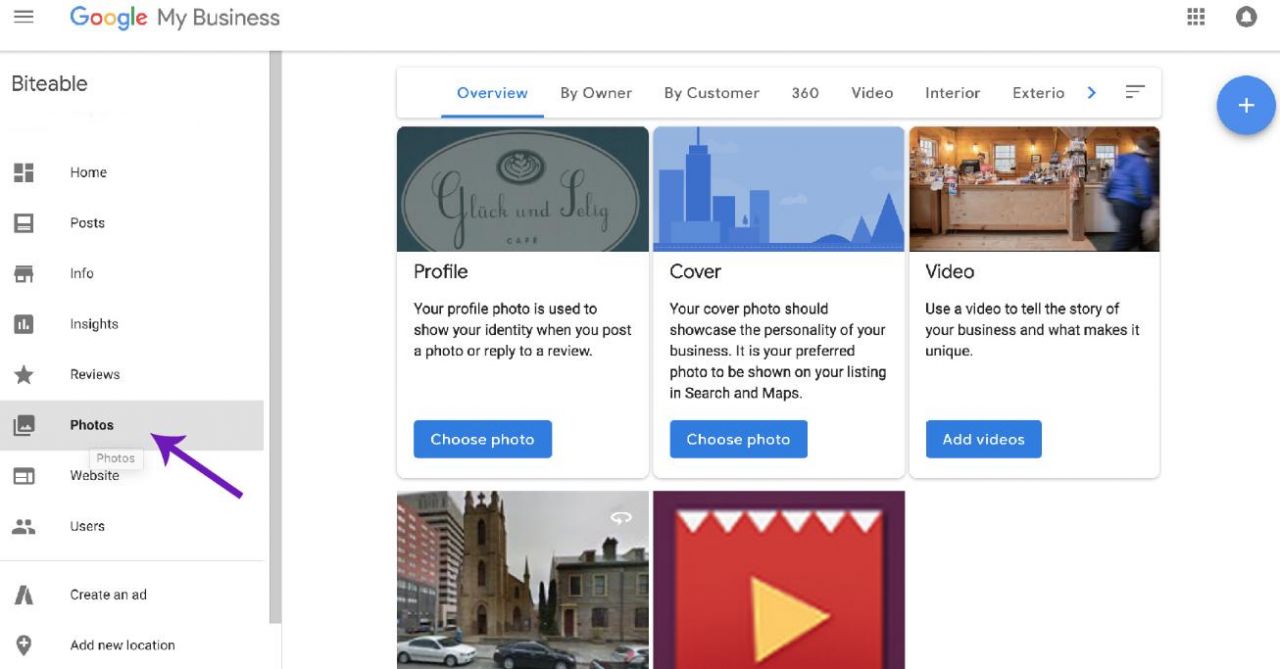
To add photos to your listing, click on “photos” on the left menu. There, you will be able to add photos of your business and even videos. Videos are a powerful component of a business profile, so if you have a good video of your business, we highly recommend you add it to your business listing. Add as many good photos and videos as you can to improve your listing.
After all of this, your listing is probably just about finished. Check the percentage on your dashboard and keep updating until you’re at 100% complete! The only thing left to do now is to verify your listing once your postcard arrives.
6. Verify Your Business with the Postcard
You should receive a postcard from Google in about five days, although sometimes it can take a little longer. If it doesn’t arrive in 14 days, you should request a new one by clicking on this link.

The postcard sent by Google will have all the information you need to verify your business, step by step. The letter will contain your verification pin and the instructions. Don’t worry, it’s super easy. Basically, you will just need to access the website address indicated on your postcard, which is https://google.com/local/verify, and enter your verification pin, click on the “submit” button, and then you’re all done!
Did you like these tips?! Then don’t forget to save the image below in your “Online Marketing Tips” board on Pinterest! Also, check out our Pinterest page and follow us to get daily updates + digital marketing and social media tips for small businesses!
We can’t wait to see what you do. Please tag us using the hashtag #GrowingMyBiz so we can see and share your work!